Woodge System Update 26.01

The Woodge 26.01 update introduces standardised system icons with new icon picker popovers, and improved activity logging that clearly tracks who changed what and when. It also adds shipment management for consignments, unallocated part detection, and a new processing indicator to improve the user interface.
Icon Picker
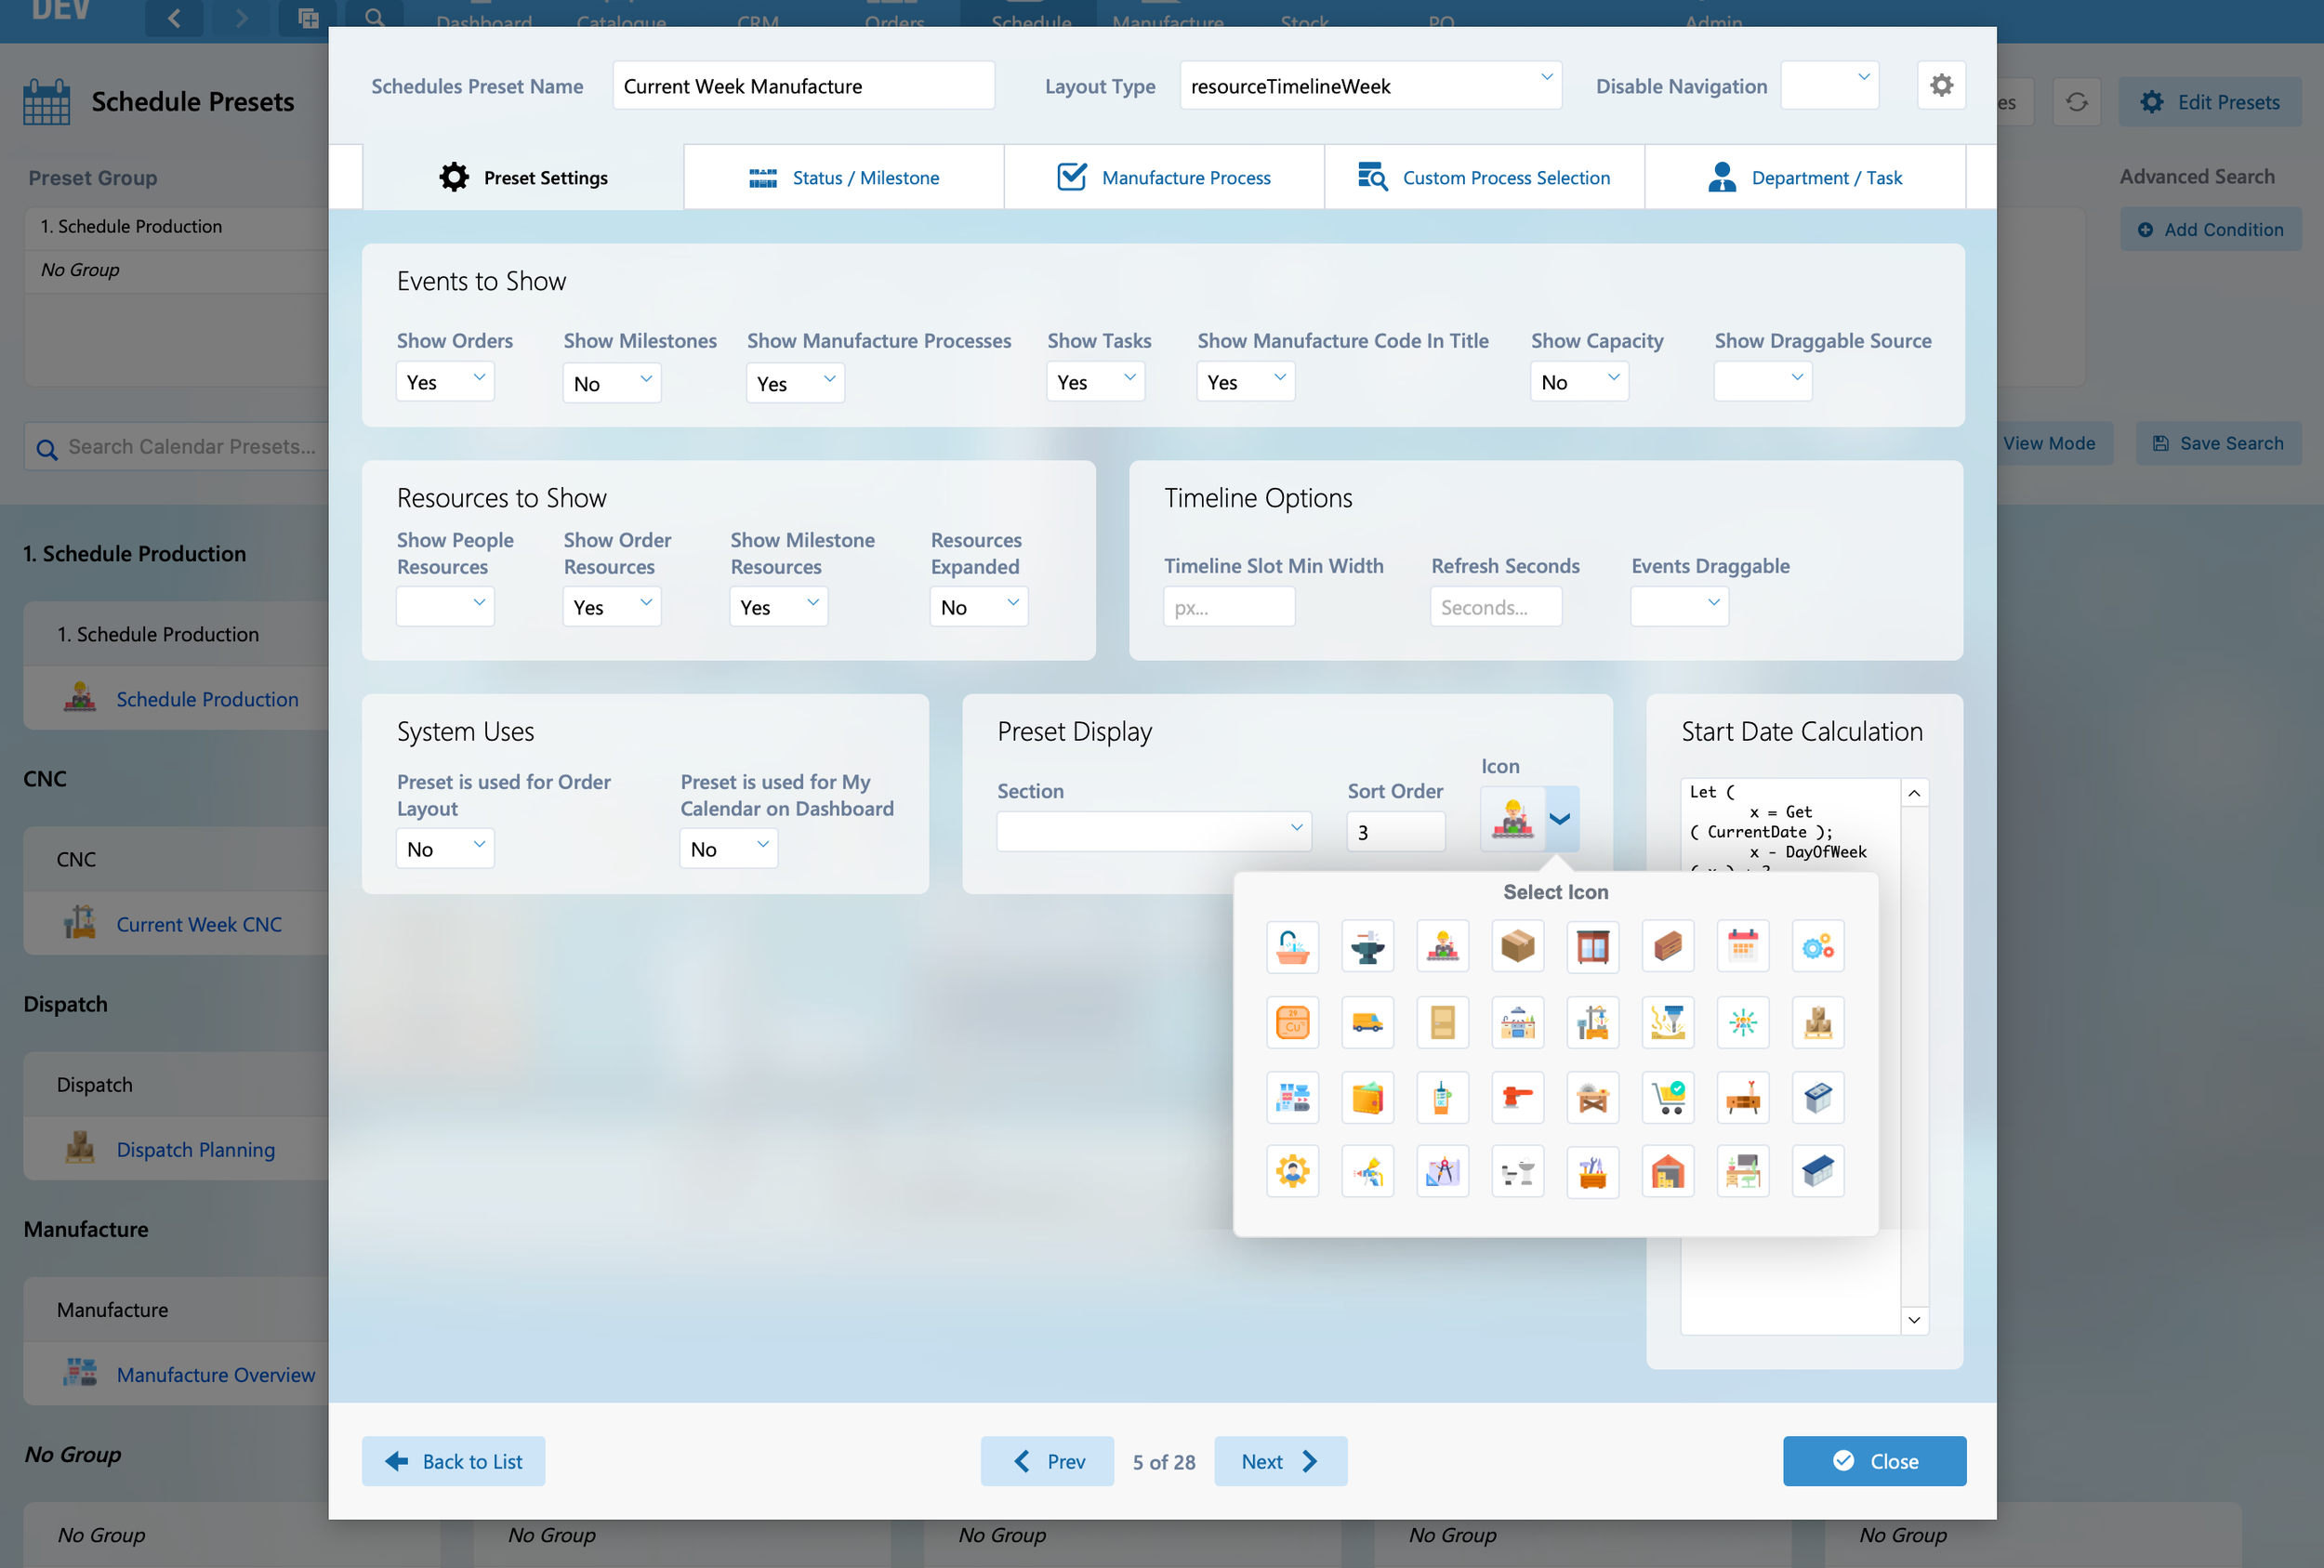
Standard sets of icons are now included in the Woodge system. The new icon pickers make it quick and easy to select an icon from the popover window. You make it easier to identify Calendar Presets from the schedule launcher by picking one of the standard icons.

An icon for Manufacture Views and Manufacture View Groups can be selected from the new popover.
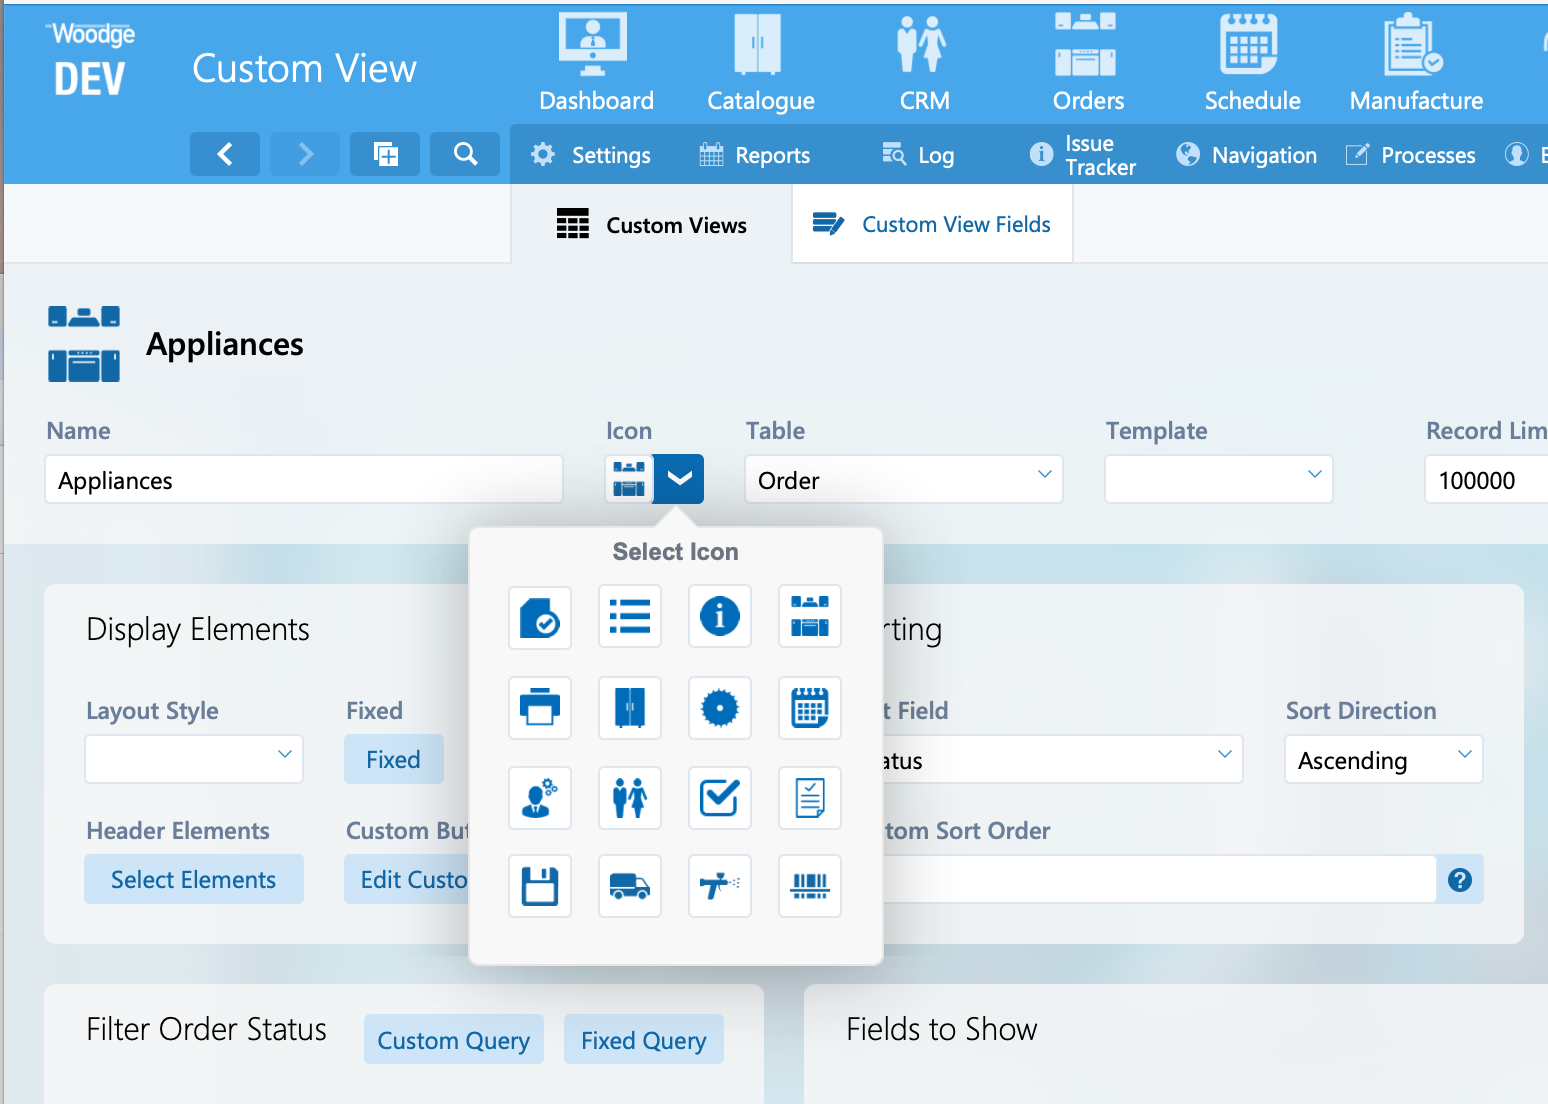
Custom Views can also have an icon selected. It’s still possible to upload your own custom icons by dragging a transparent PNG into the field.

It’s also possible to add a custom image by right-clicking on the Icon field and selecting ‘Insert Picture…’.
Improved Activity Logging
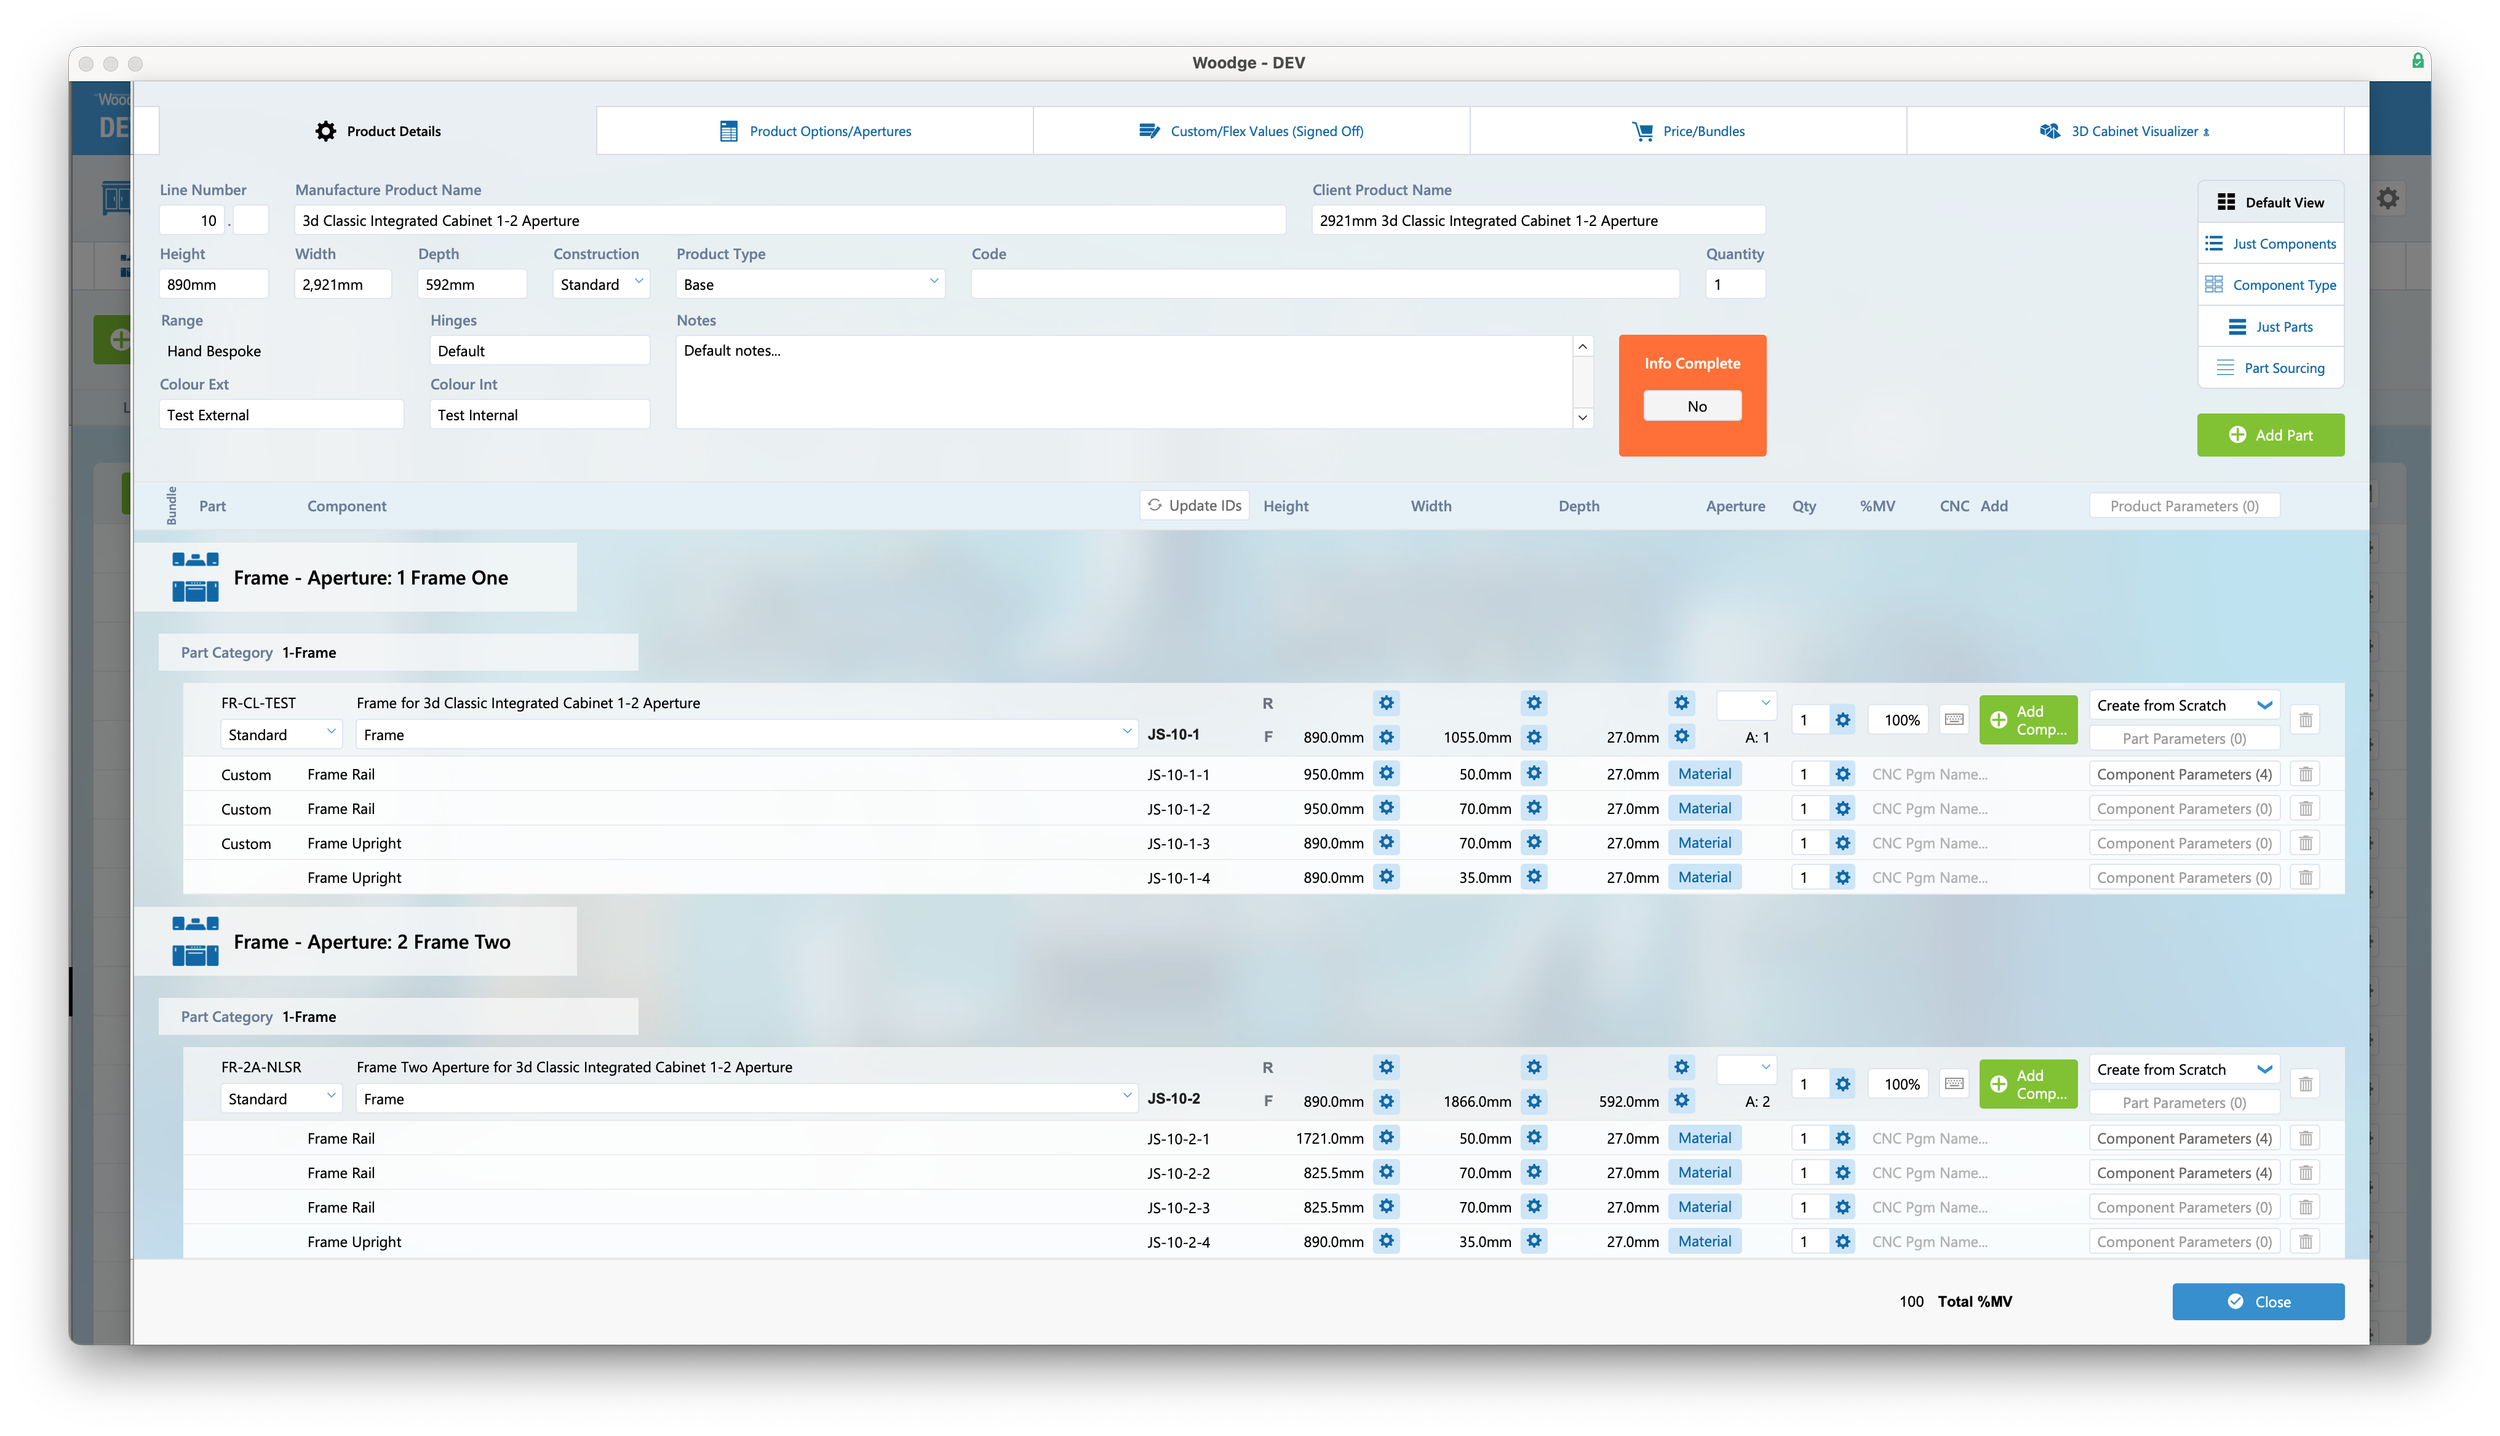
Changes made to a line item from the Edit Components card window are now traced in the activity log.
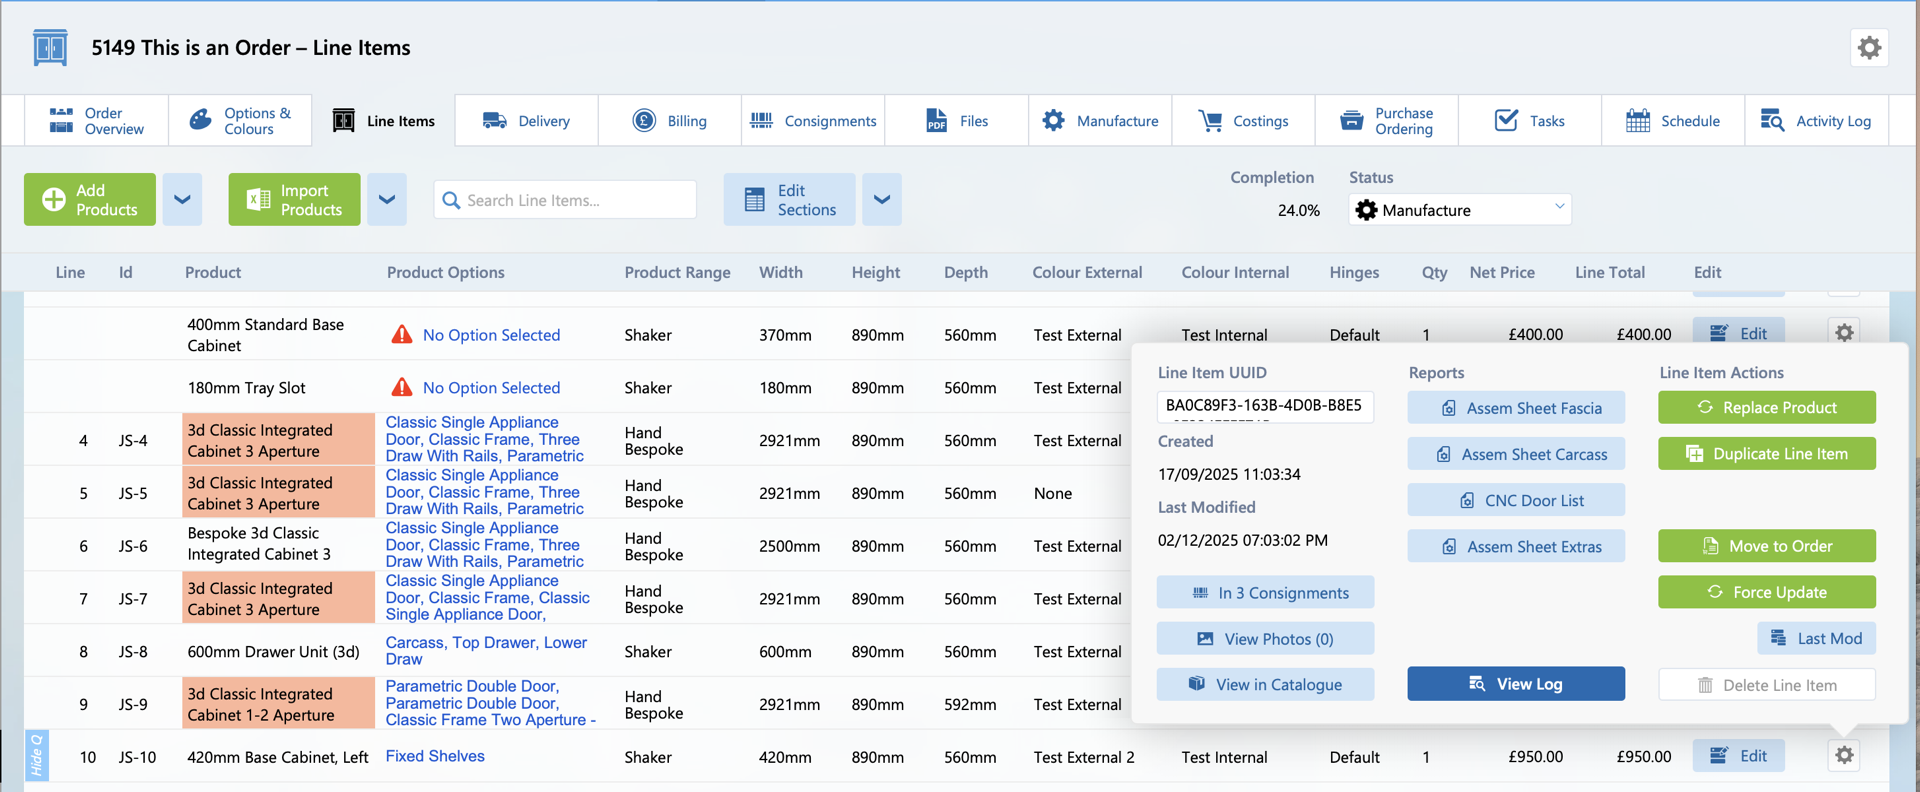
The changes made to a line item can be viewed by clicking the cog button on the far right of the line item, and clicking the ‘View Log’ button.
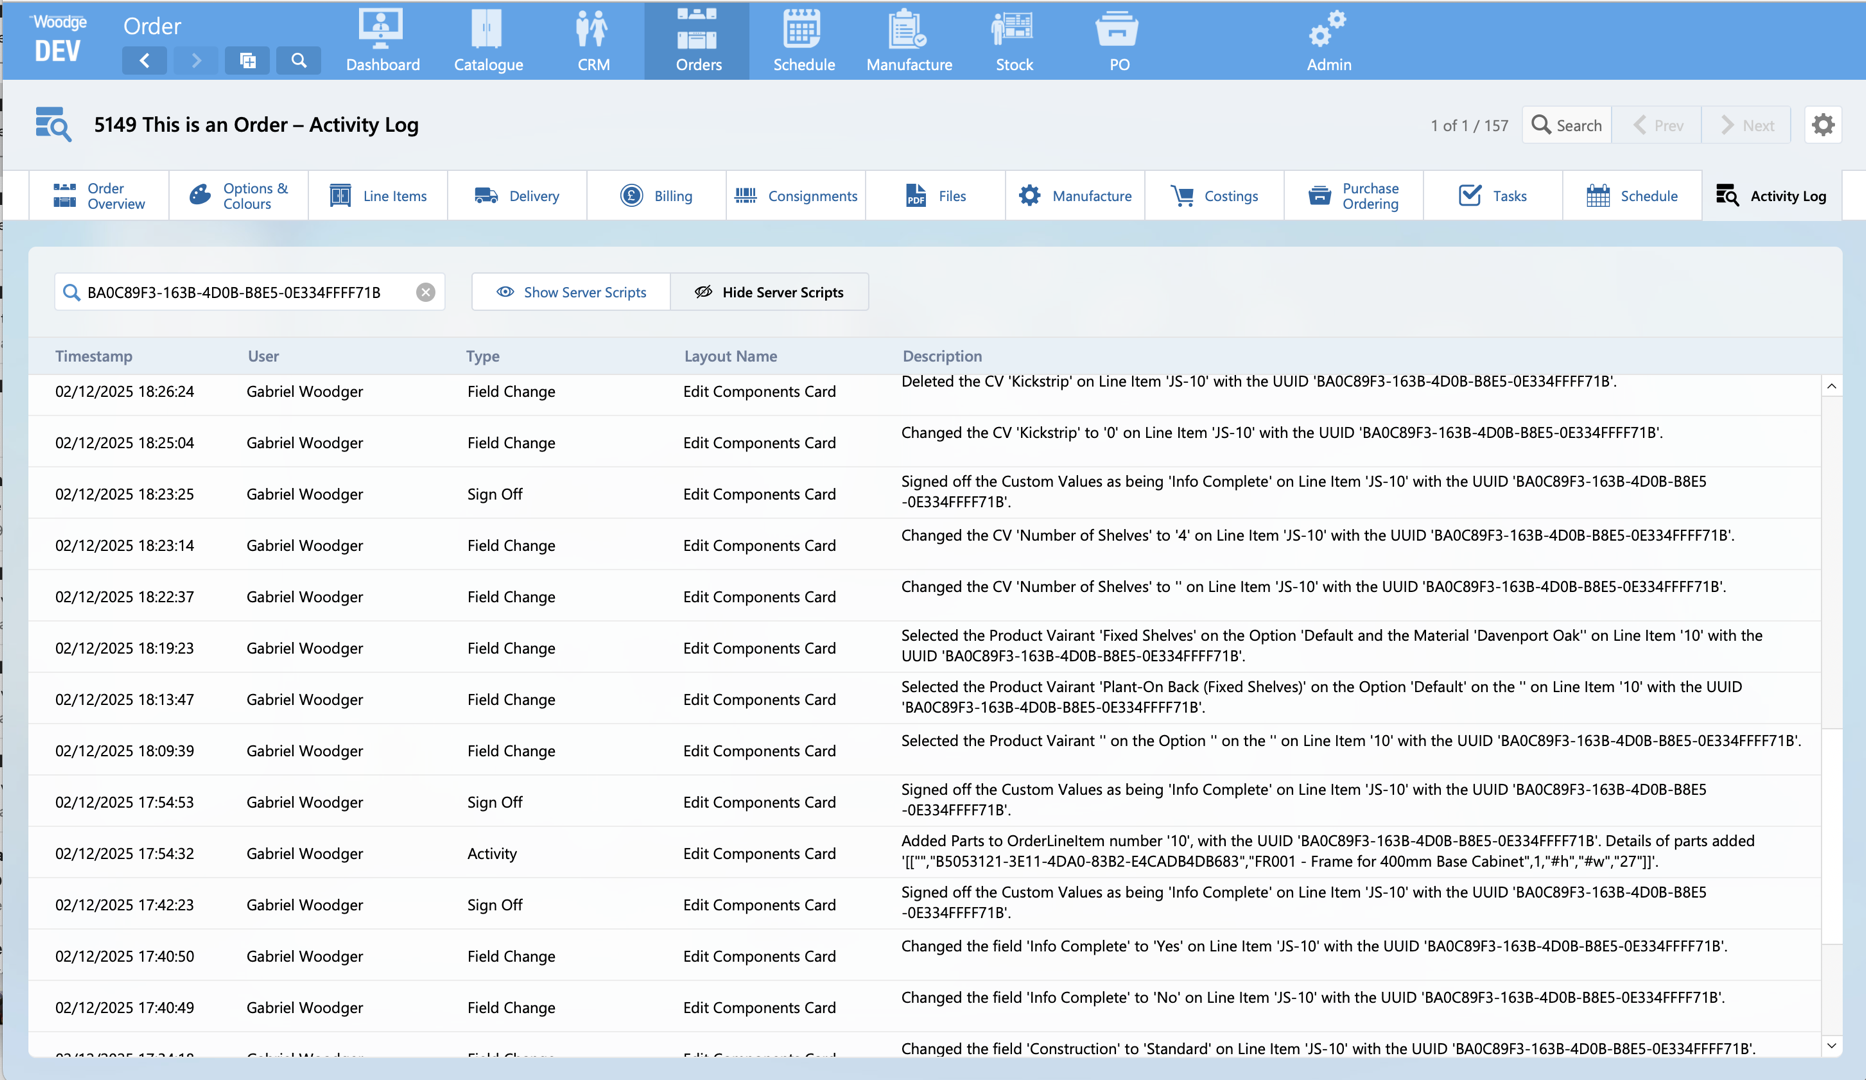
The activity log shows who, when and what change was made to each field. This robust logging makes it clear what modifications have been made and can be very useful in identifying the root cause of issues or unexpected change.
Processing Indicator
The Woodge system now displays an animated processing indicator to indicate when a line item is being processed.
Consignment Shipments
It’s now possible to organise consignments into one or more separate shipments. Each shipment can contains certain parts of the order and be scheduled to be delivered on different dates.
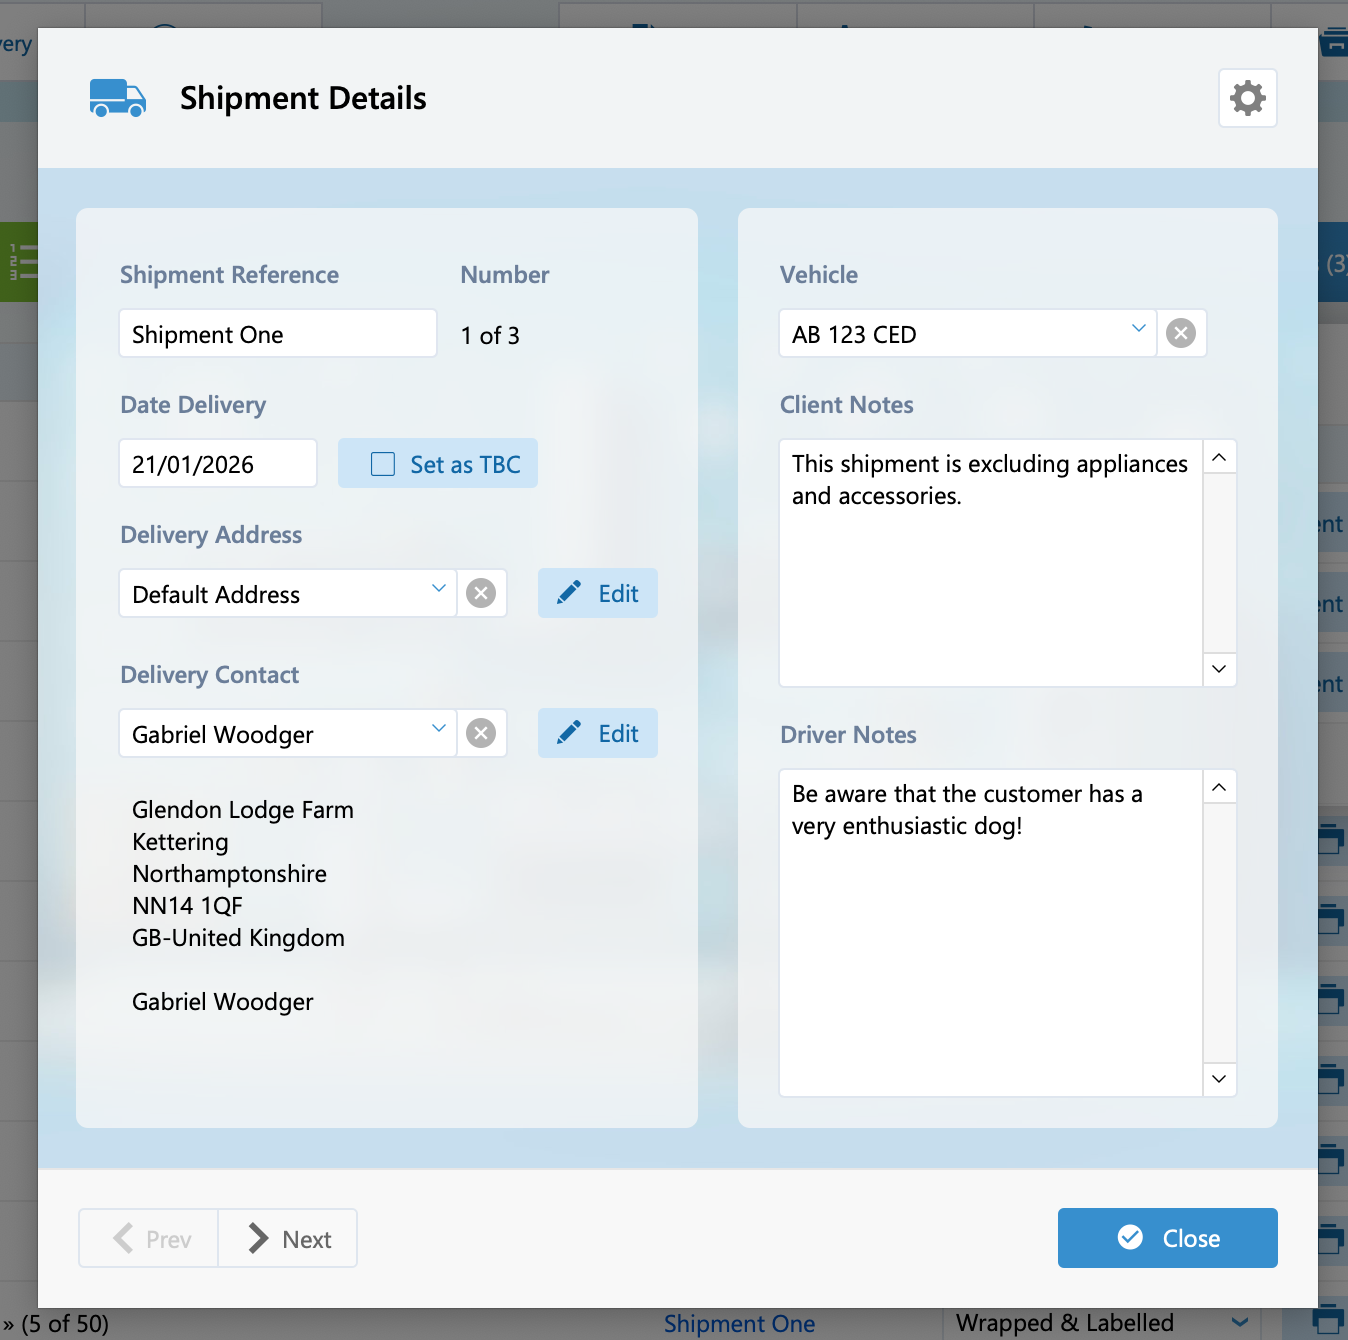
Each shipment can have different delivery date, address, contact, vehicle allocation, client and driver notes.
When the consignment allocation is first calculated for an order, a default shipment is created. All consignments are allocated to the default shipment.
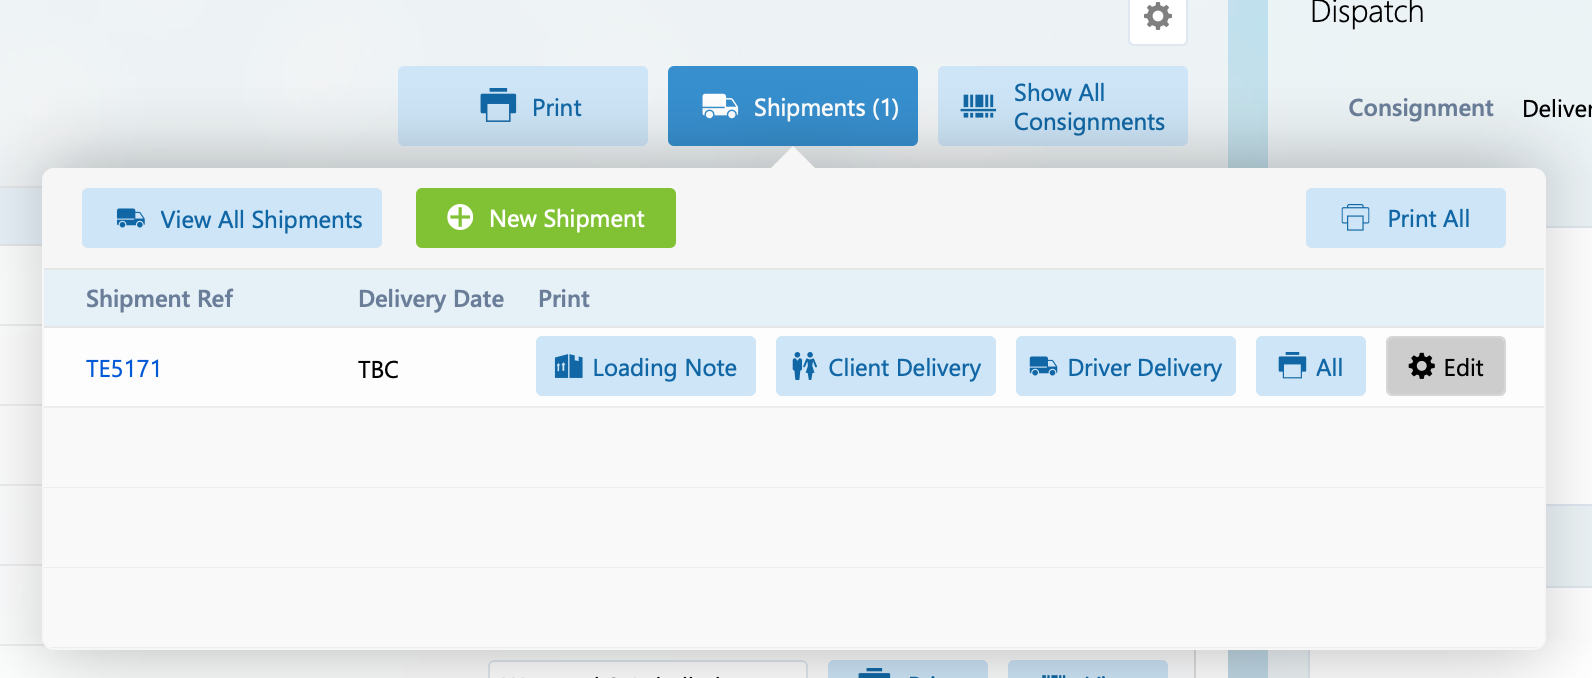
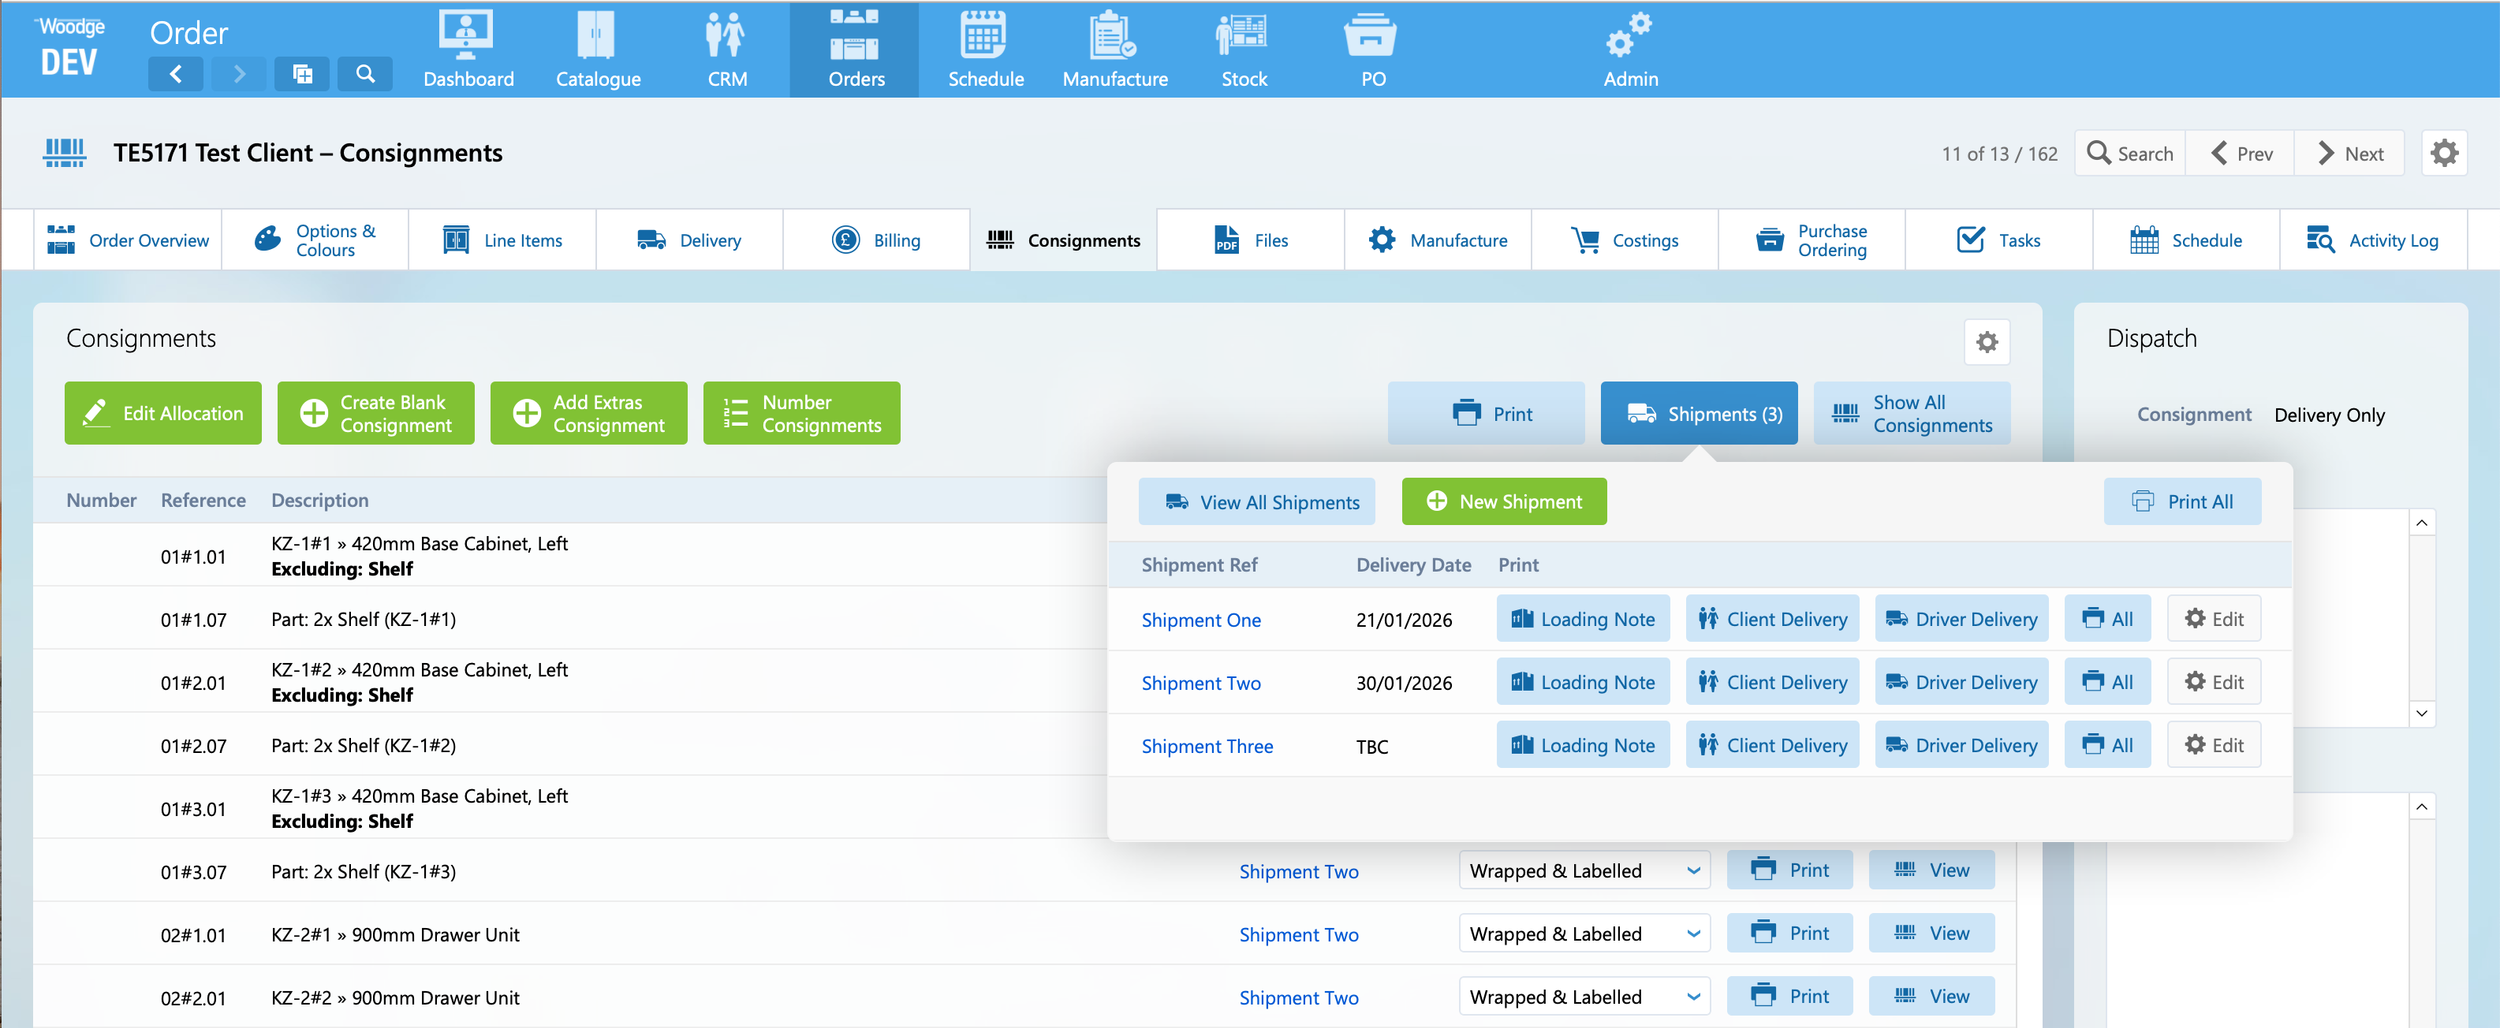
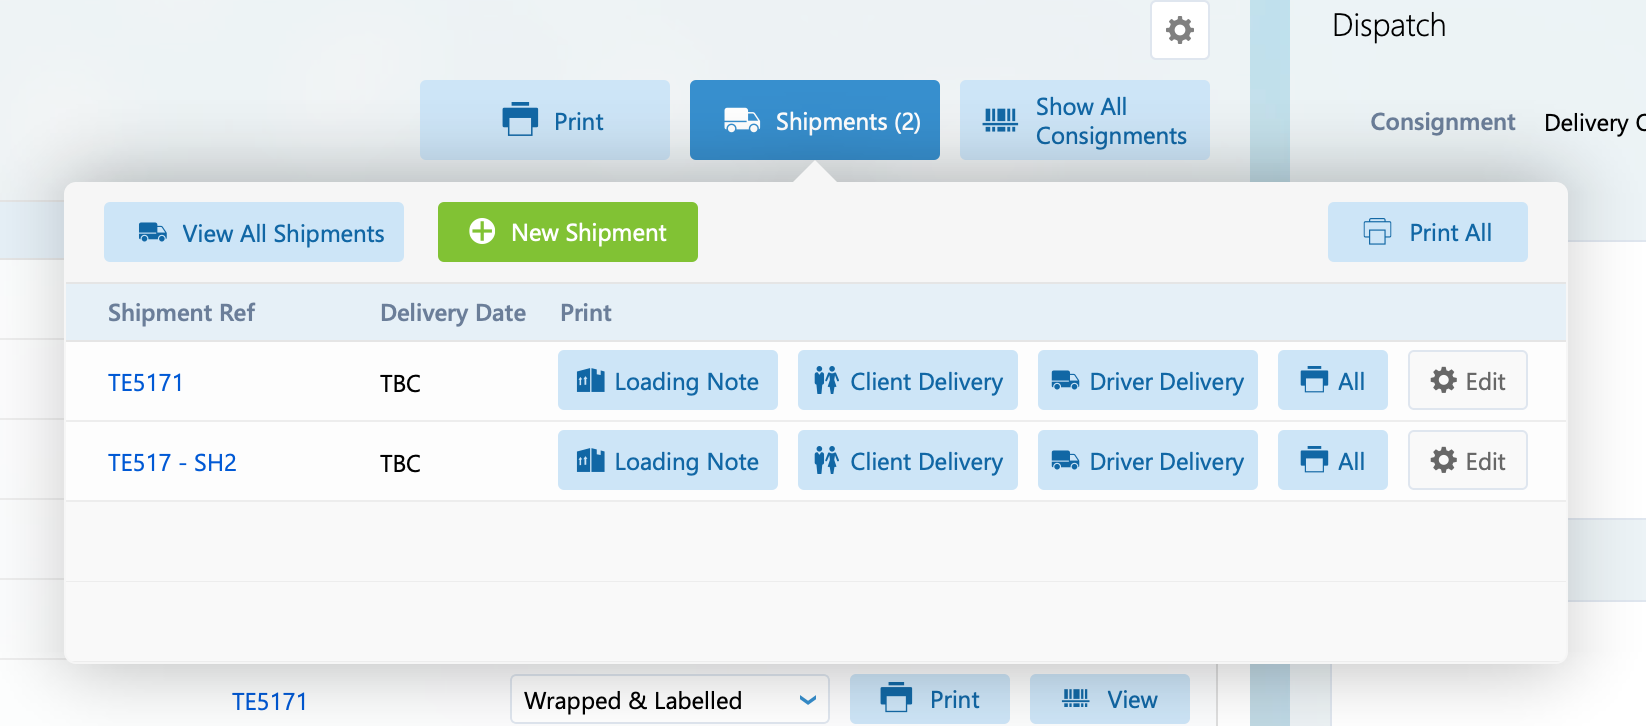
The details of the shipment can be accessed by clicking the ‘Edit’ button in the Shipments popover.
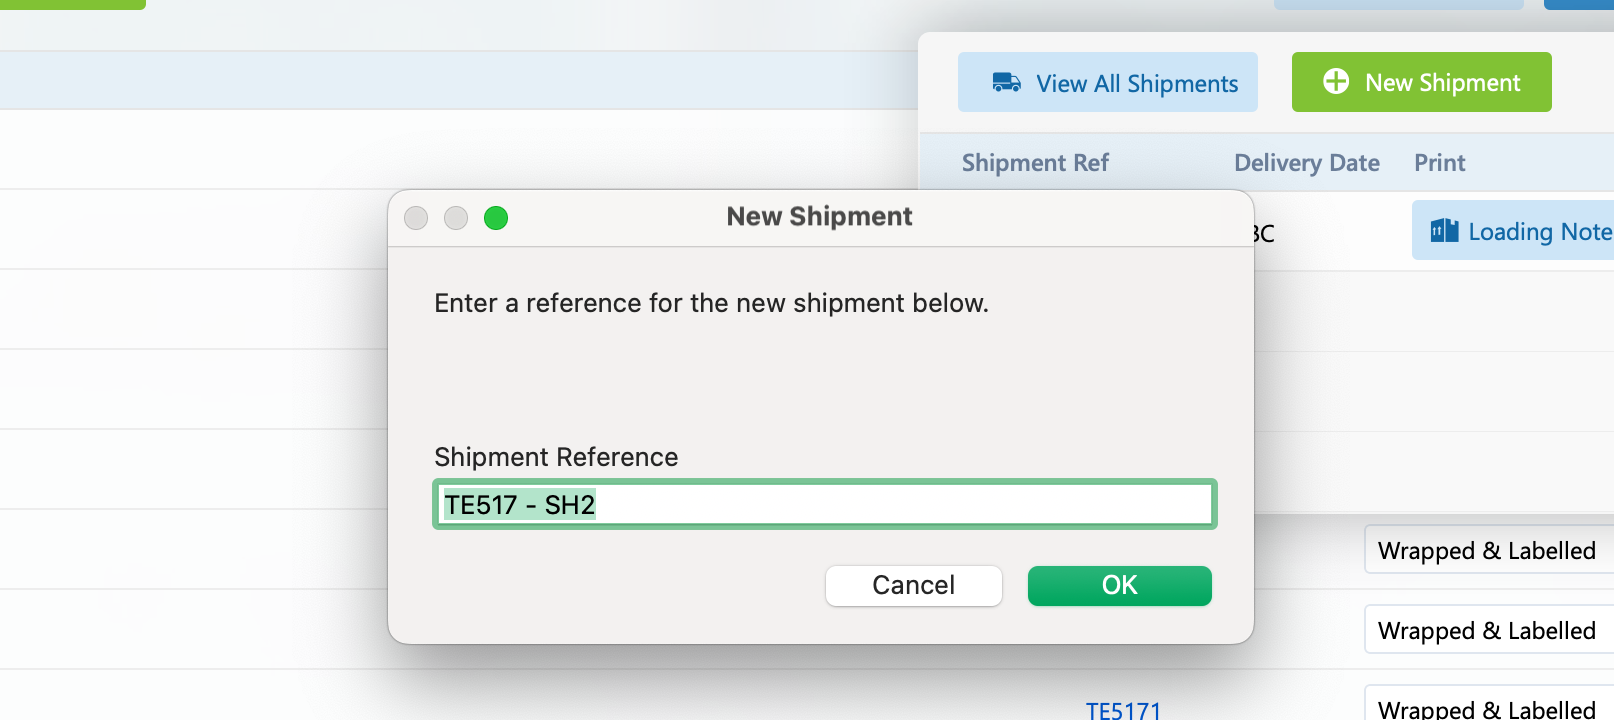
If some parts of the order need to be sent in a different delivery then you can click ‘New Shipment’. You will then be prompted to enter a reference for this new shipment.
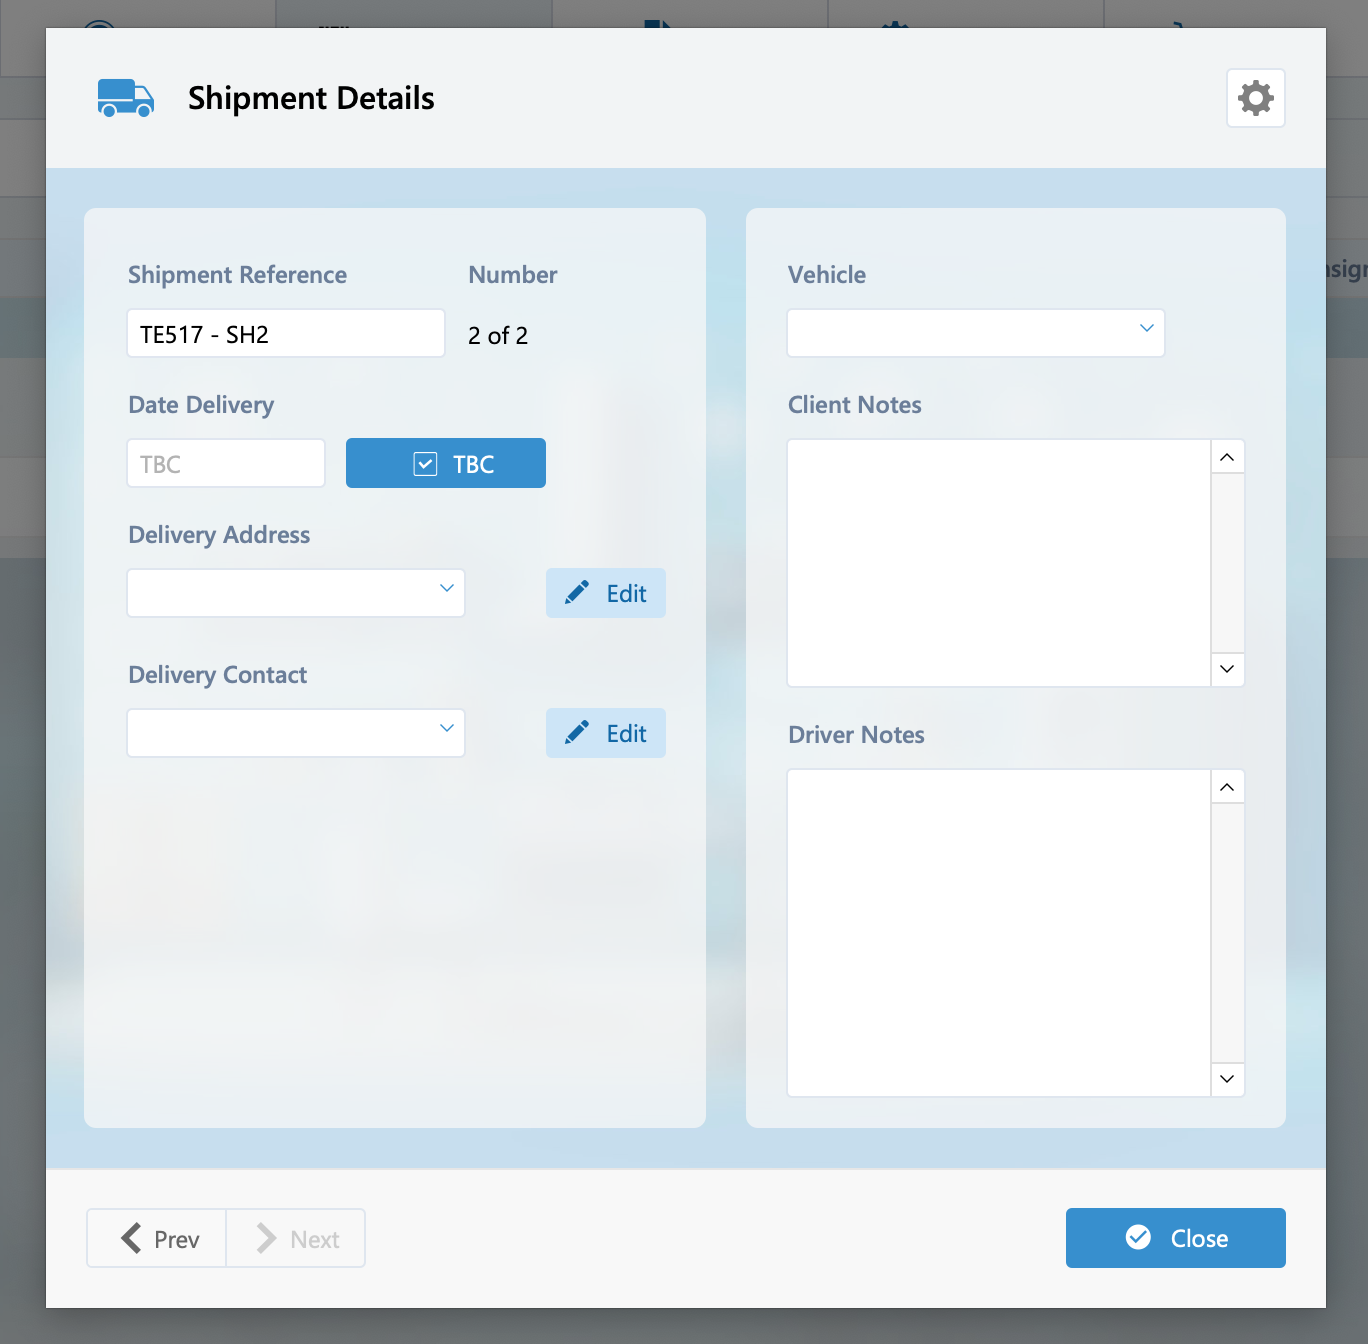
The first shipment created will default to the delivery date set on the order, additional shipments will default to a ‘TBC’ shipment date that will need to be manually specified.
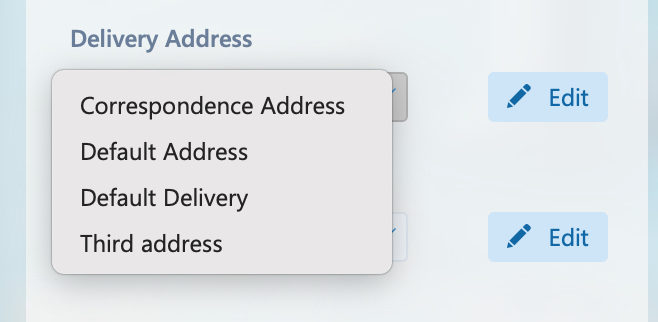
An address can be selected from the available addresses set on the client.
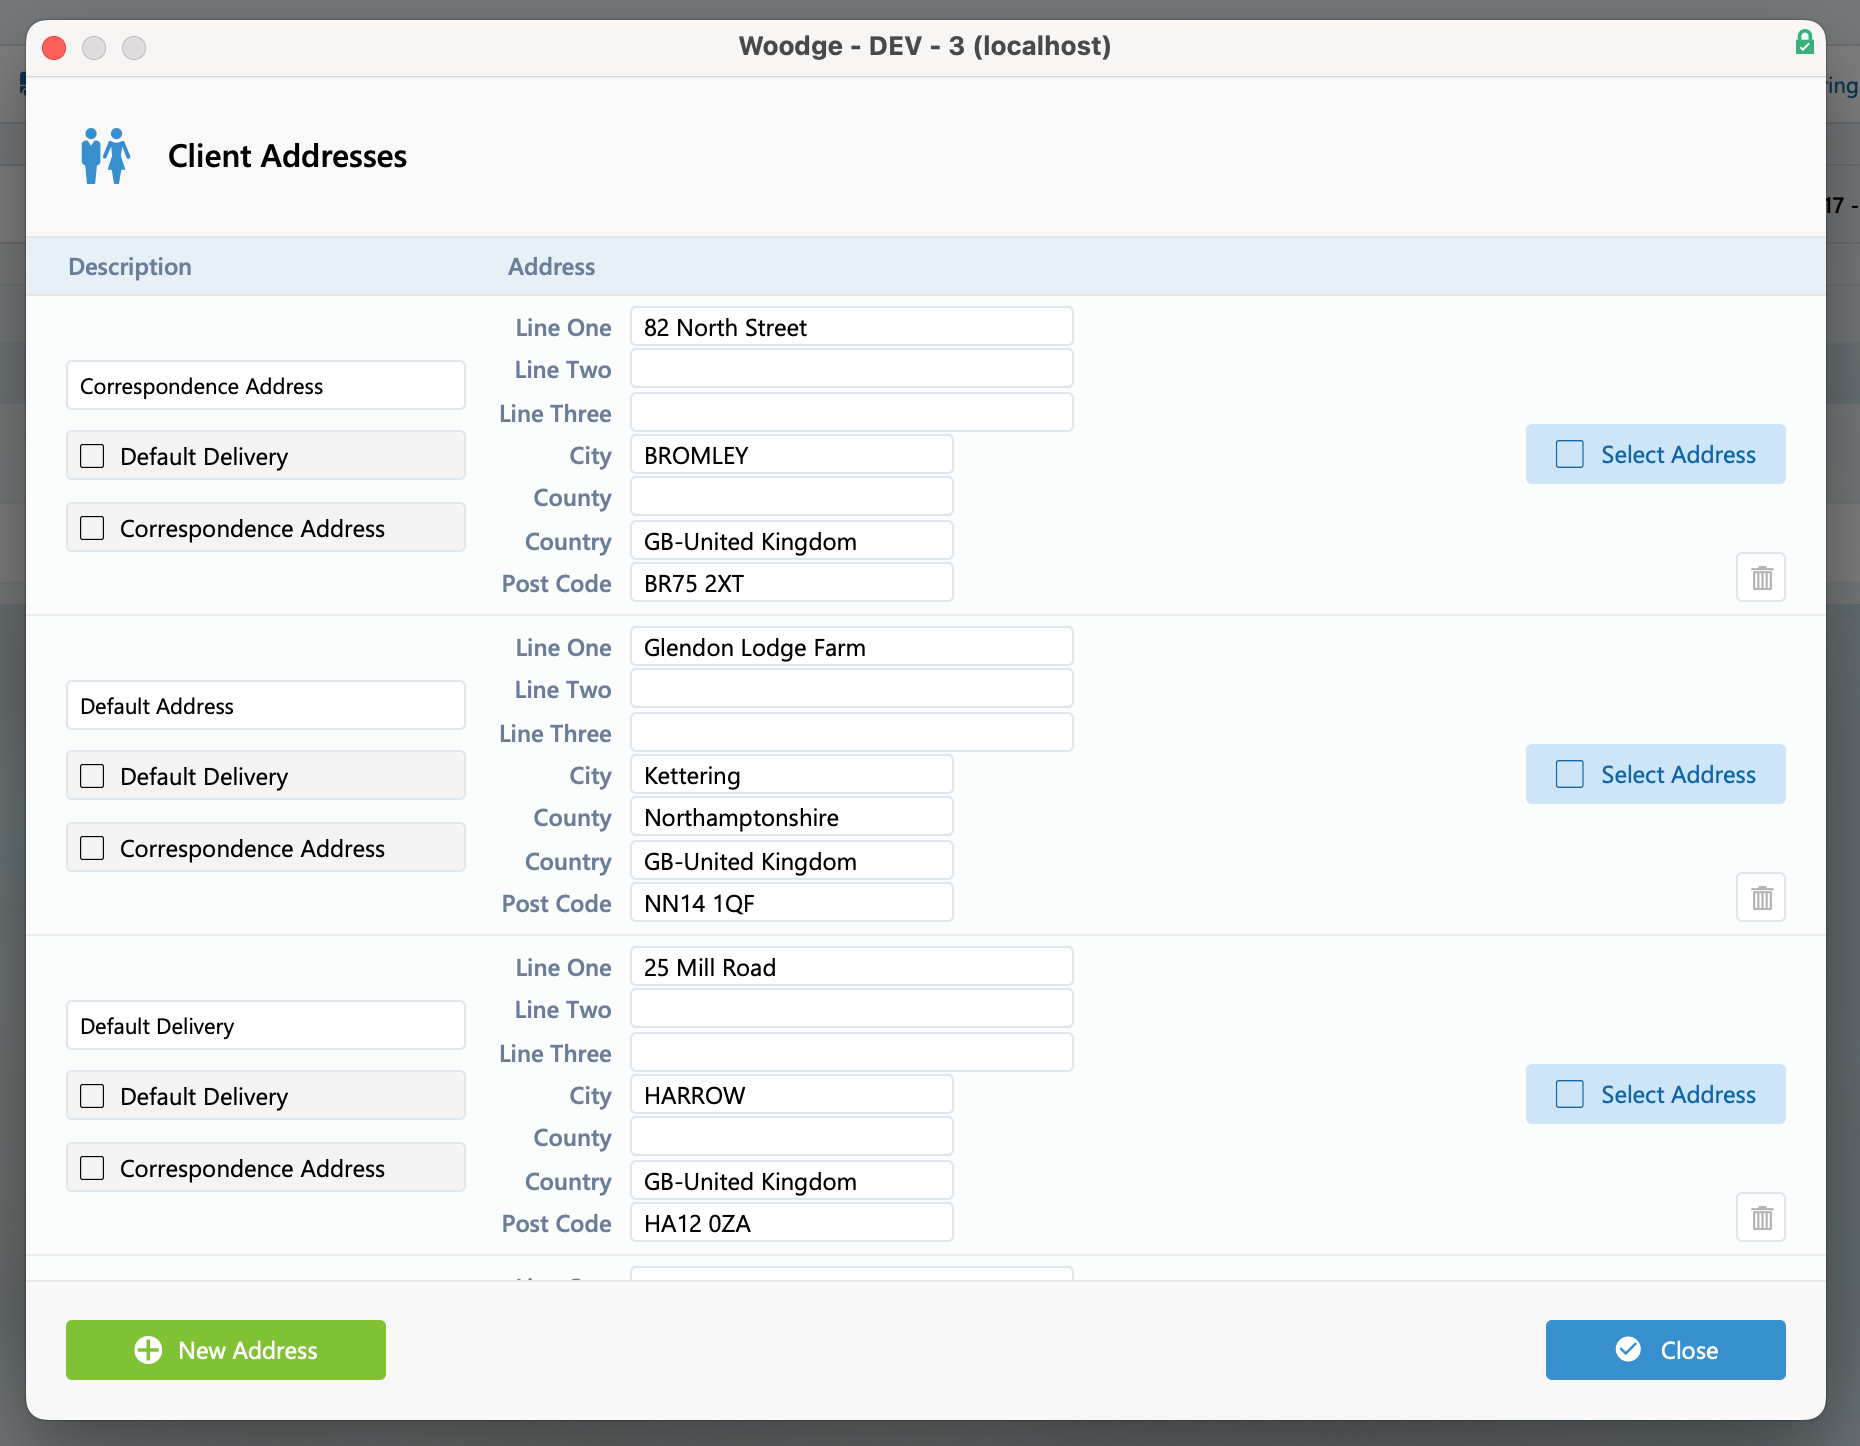
If the details of the address need modifying or a new address added you can click the ‘Edit’ button to open the above window. From this window the required changes can be made and the correct address selected.
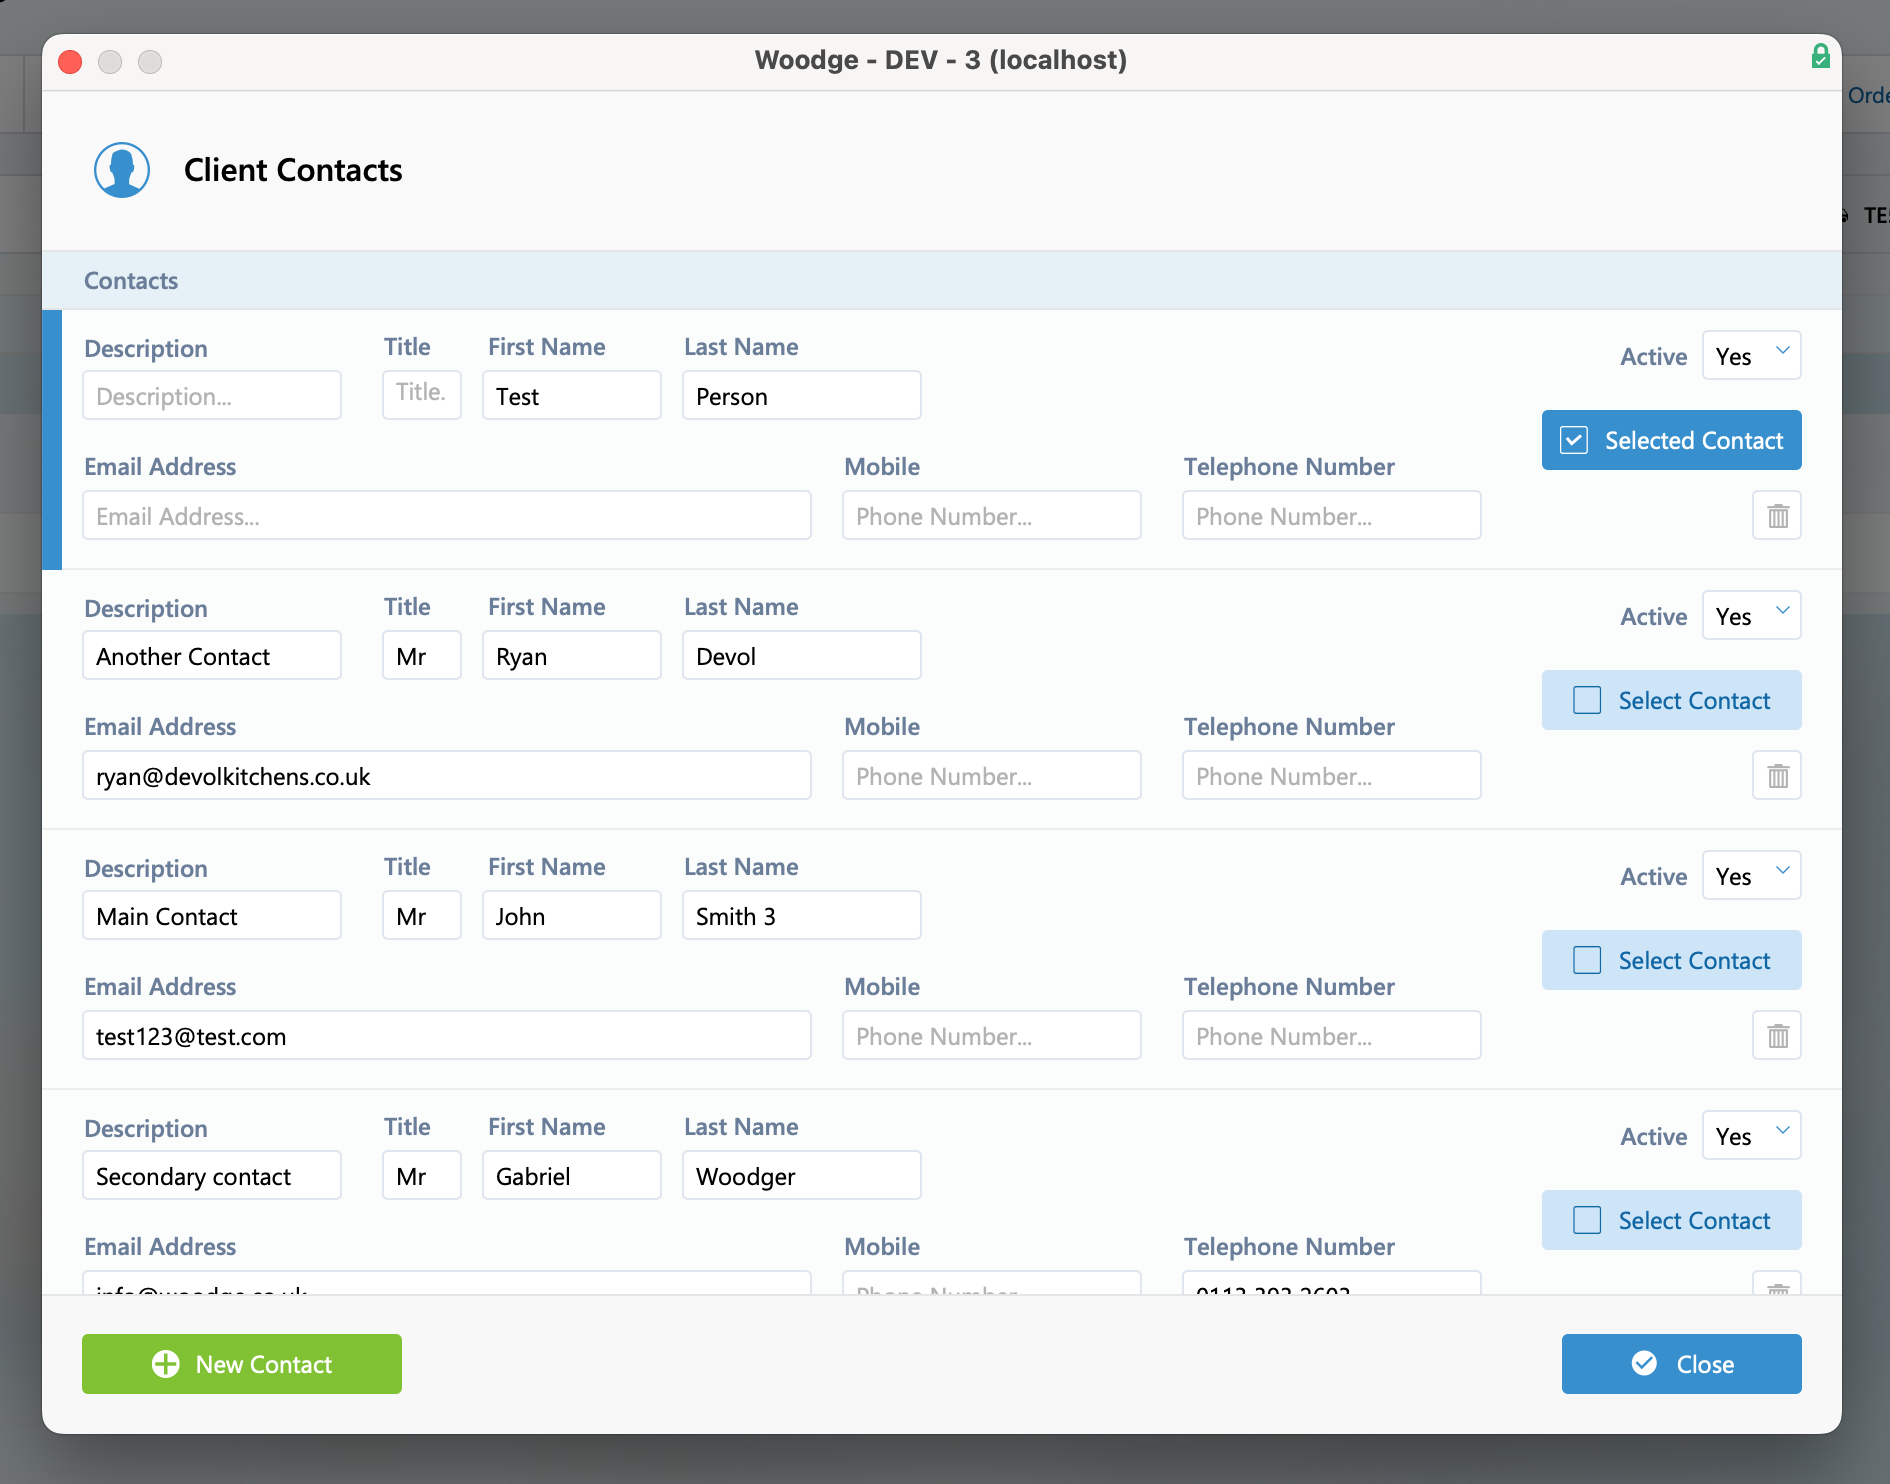
The same can be done for client contacts as well.
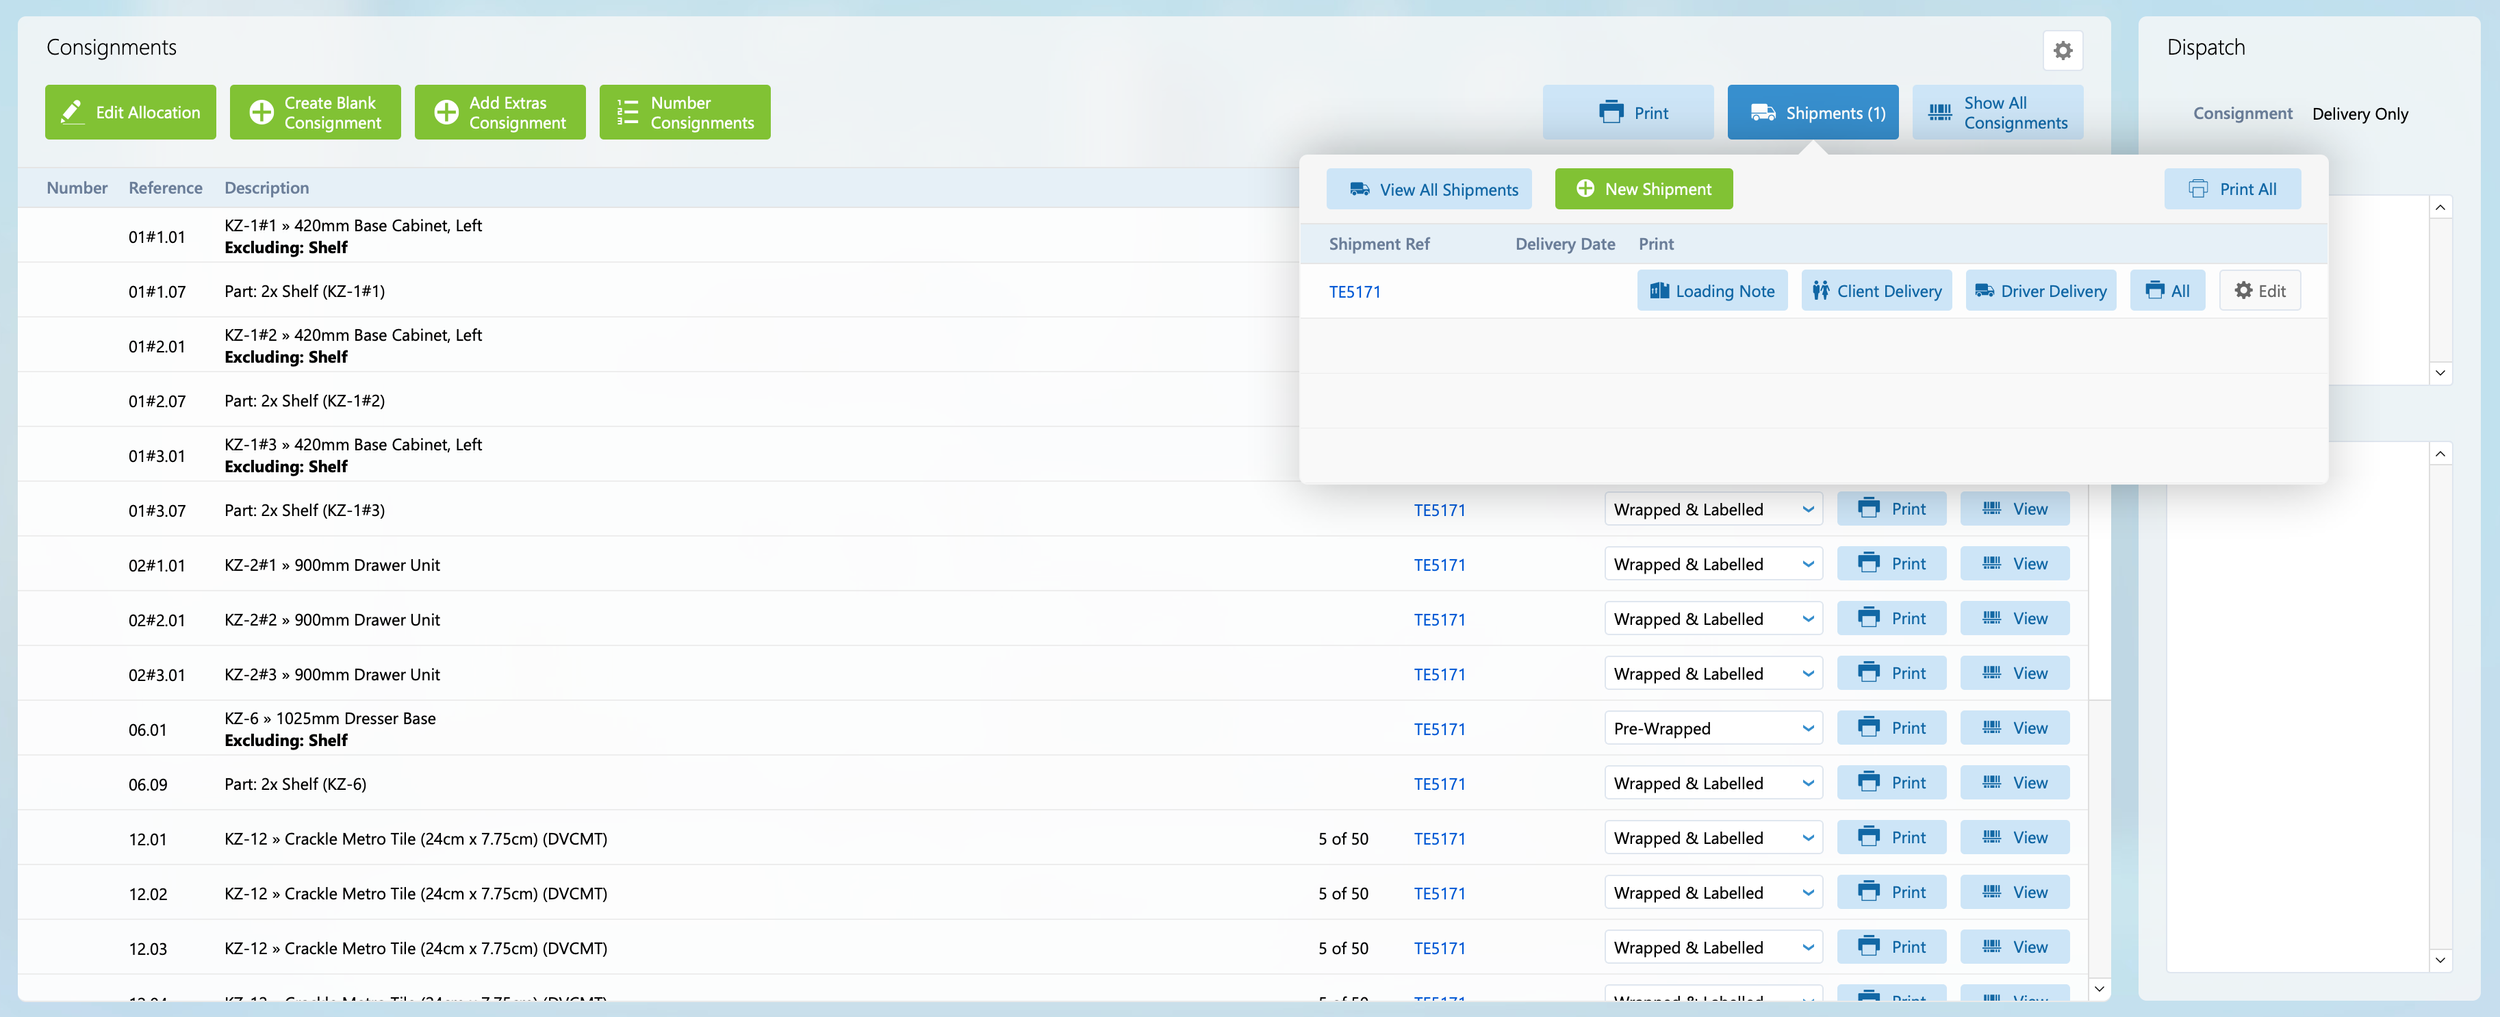
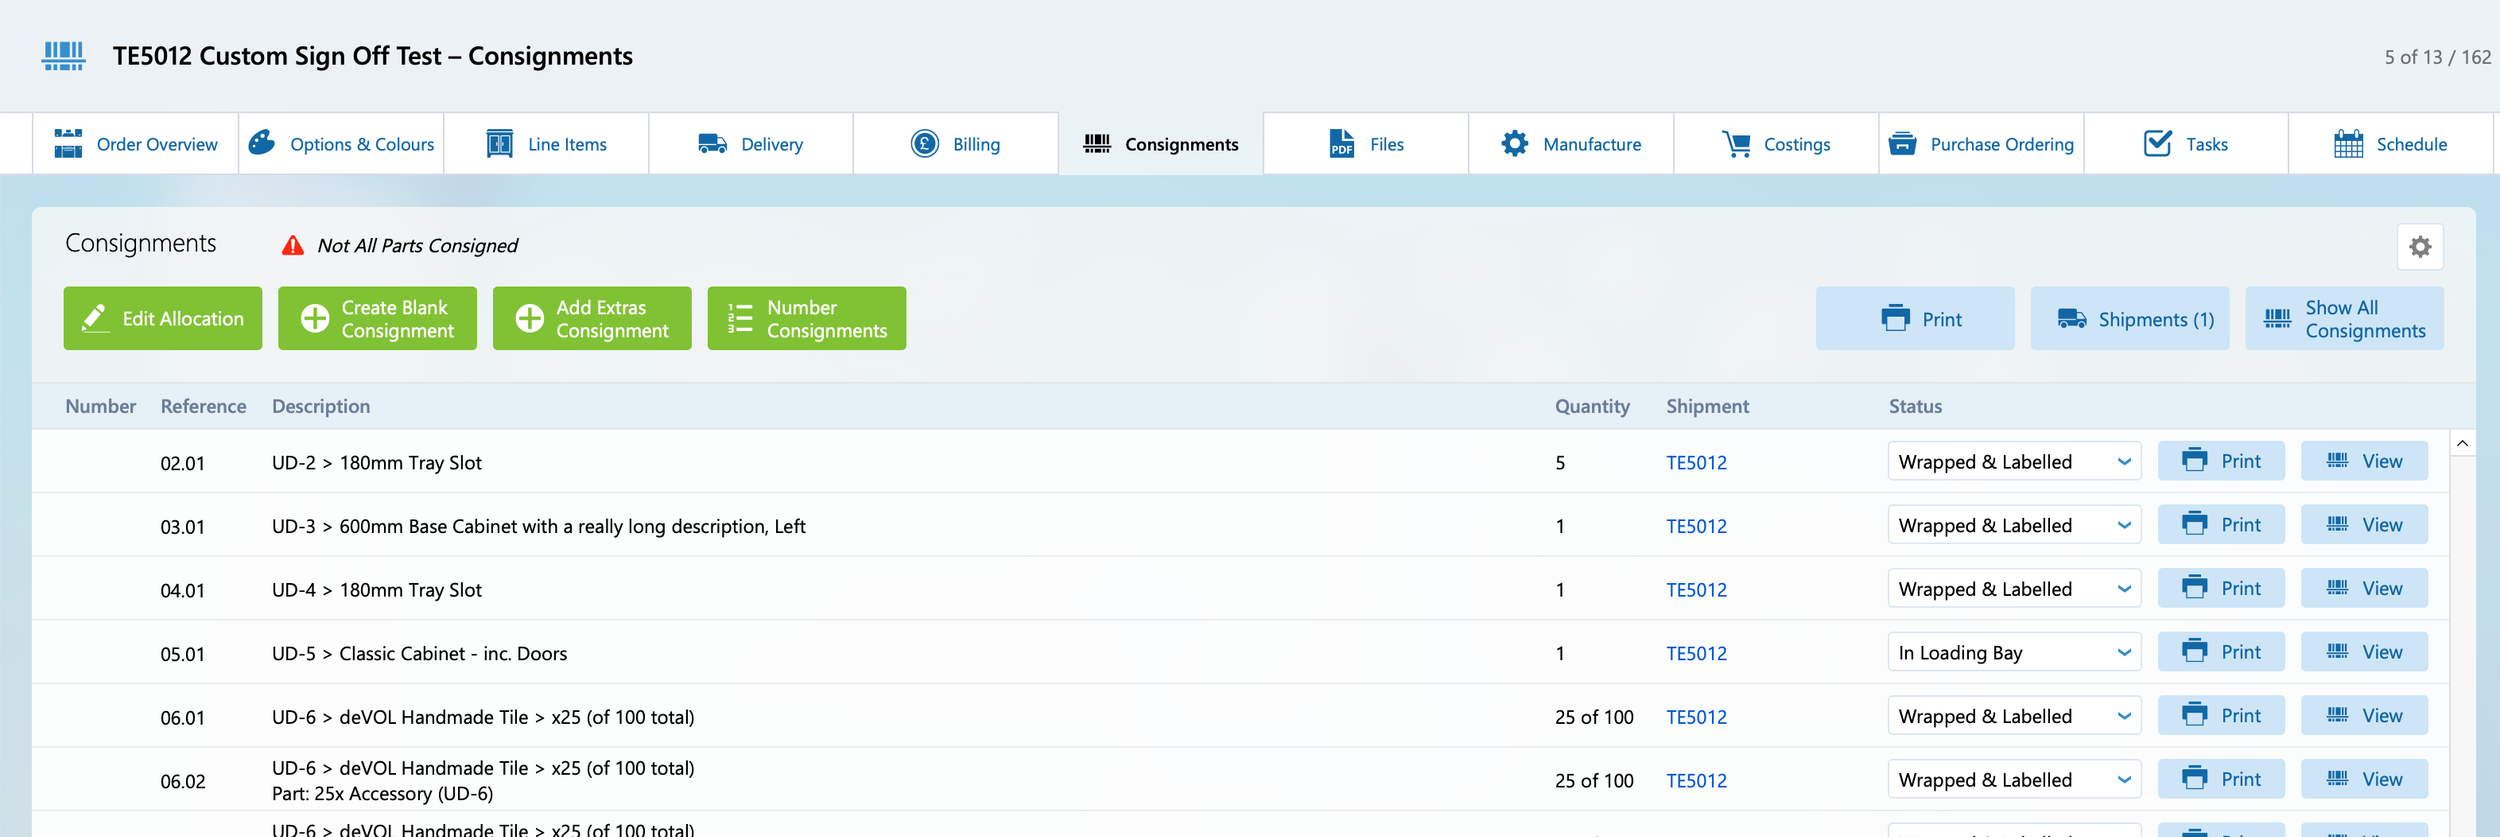
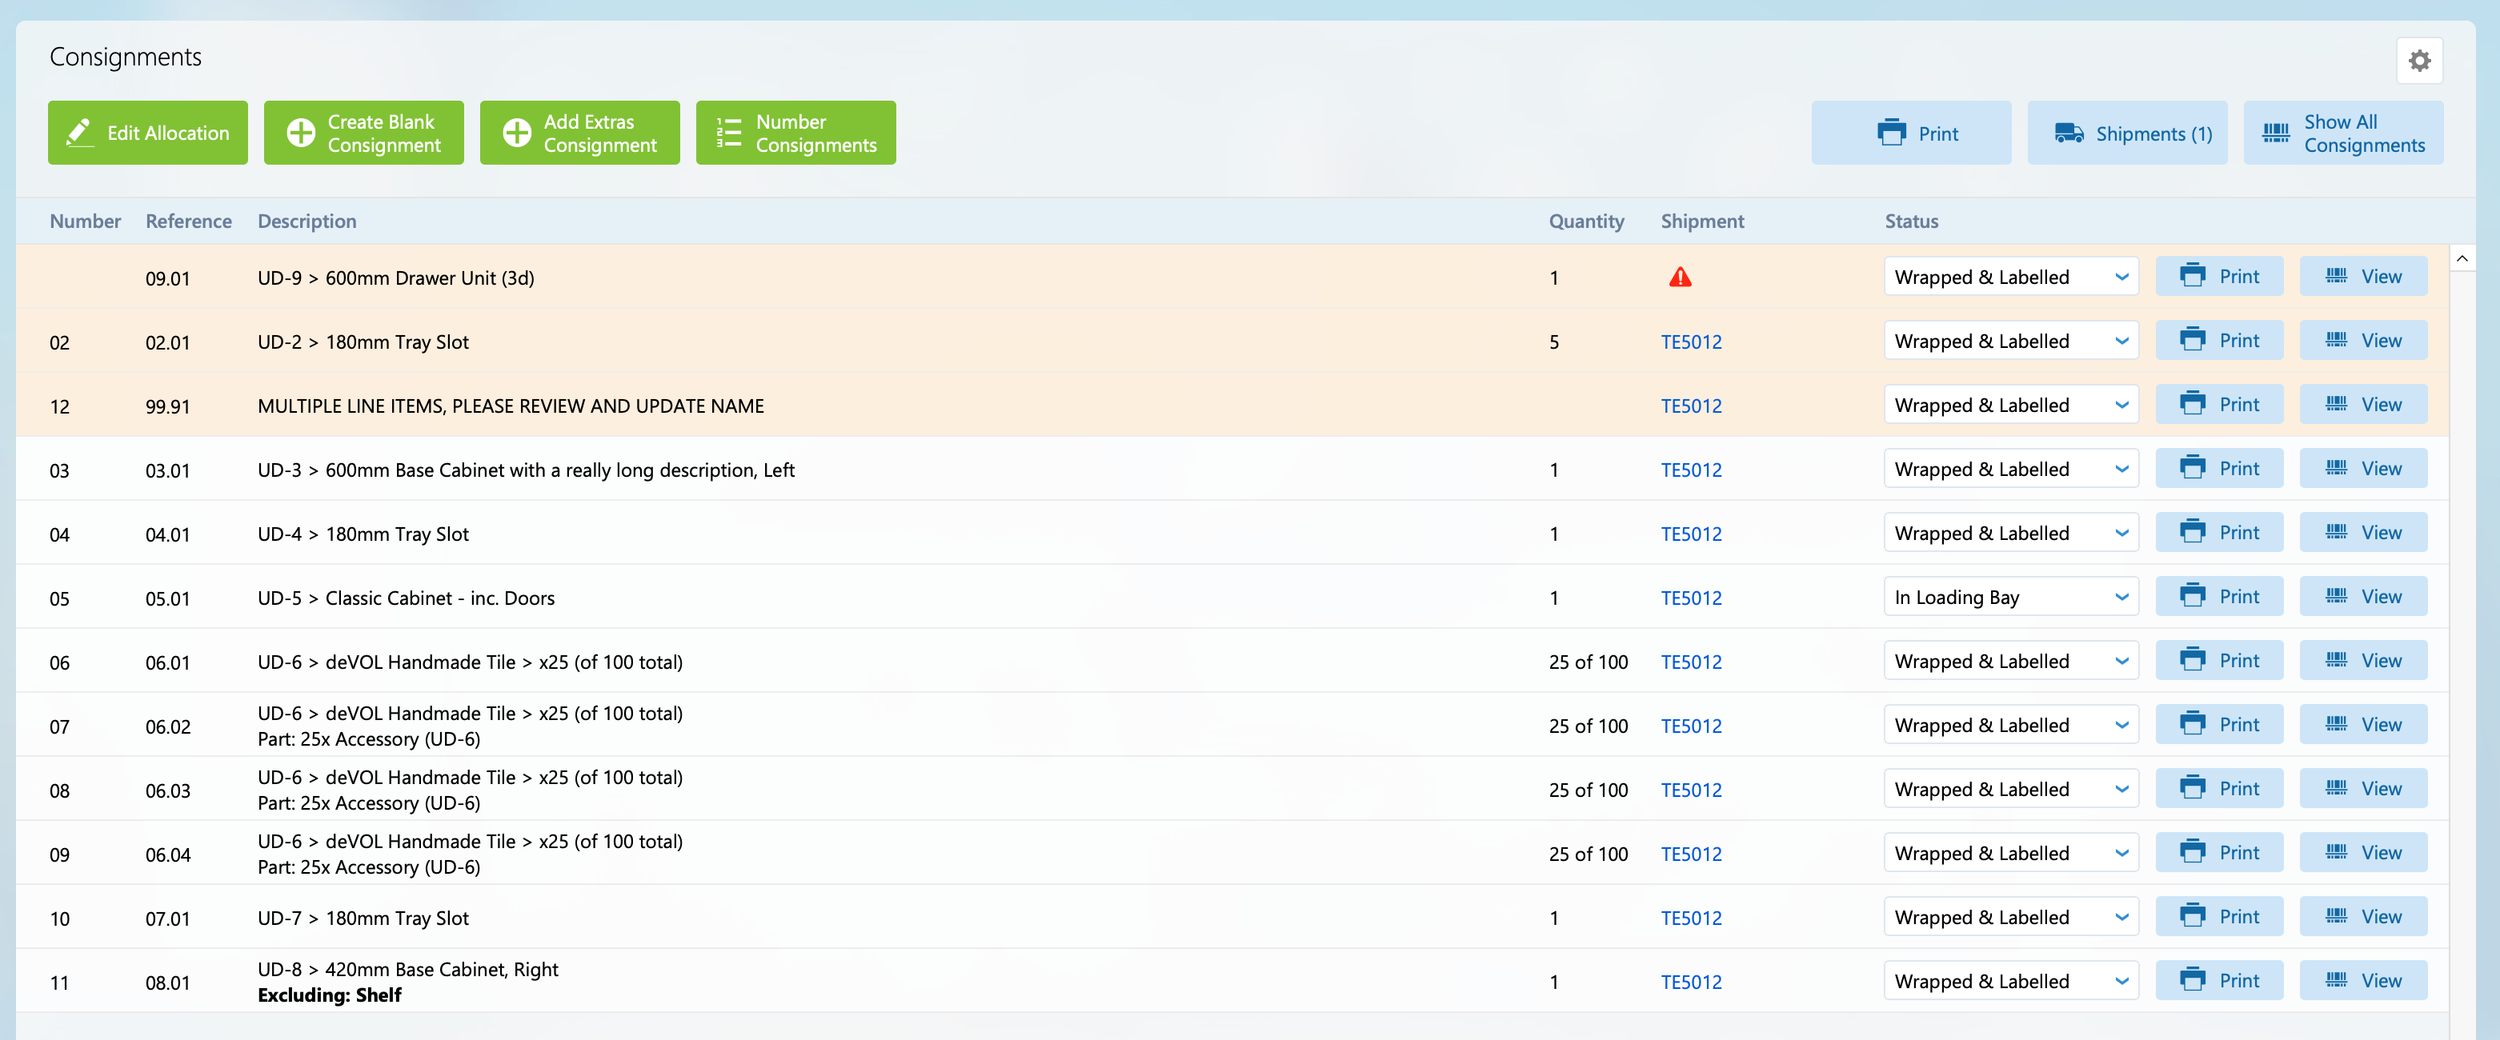
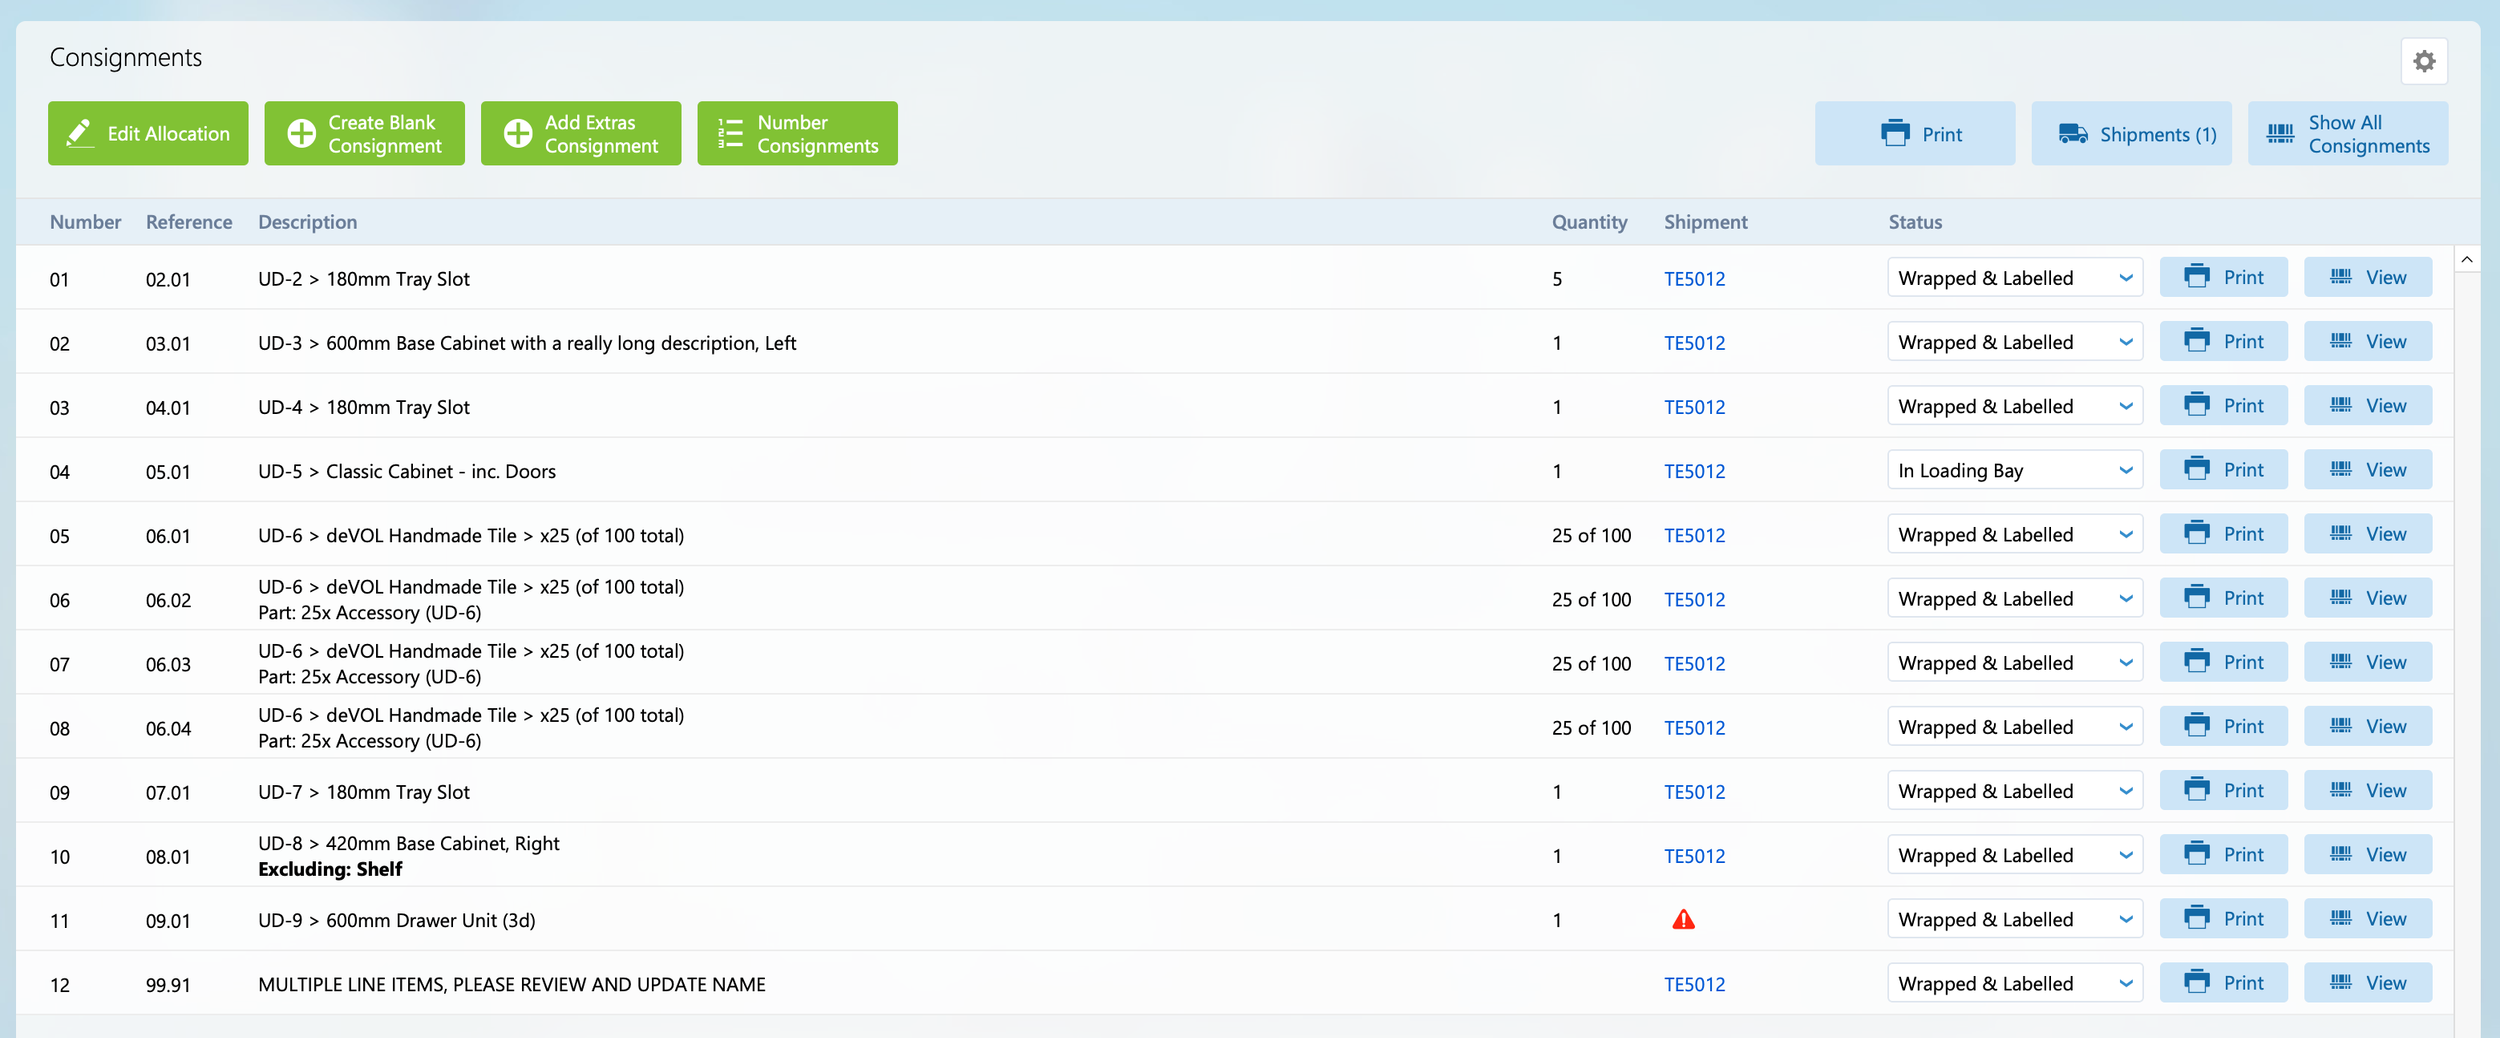
After closing the card window, you will see the new shipment. To change which shipment consignments are assigned to, you can go to the shipment view for all shipments by clicking ‘View All Shipments’, or view a specific shipment by clicking its reference.

For this layout you can see all the consignments and which shipments they are part of. The button bar at the top allows you to filter between all shipments and individual shipments.

From the shipment drop-down you can move a consignment to a different shipment.
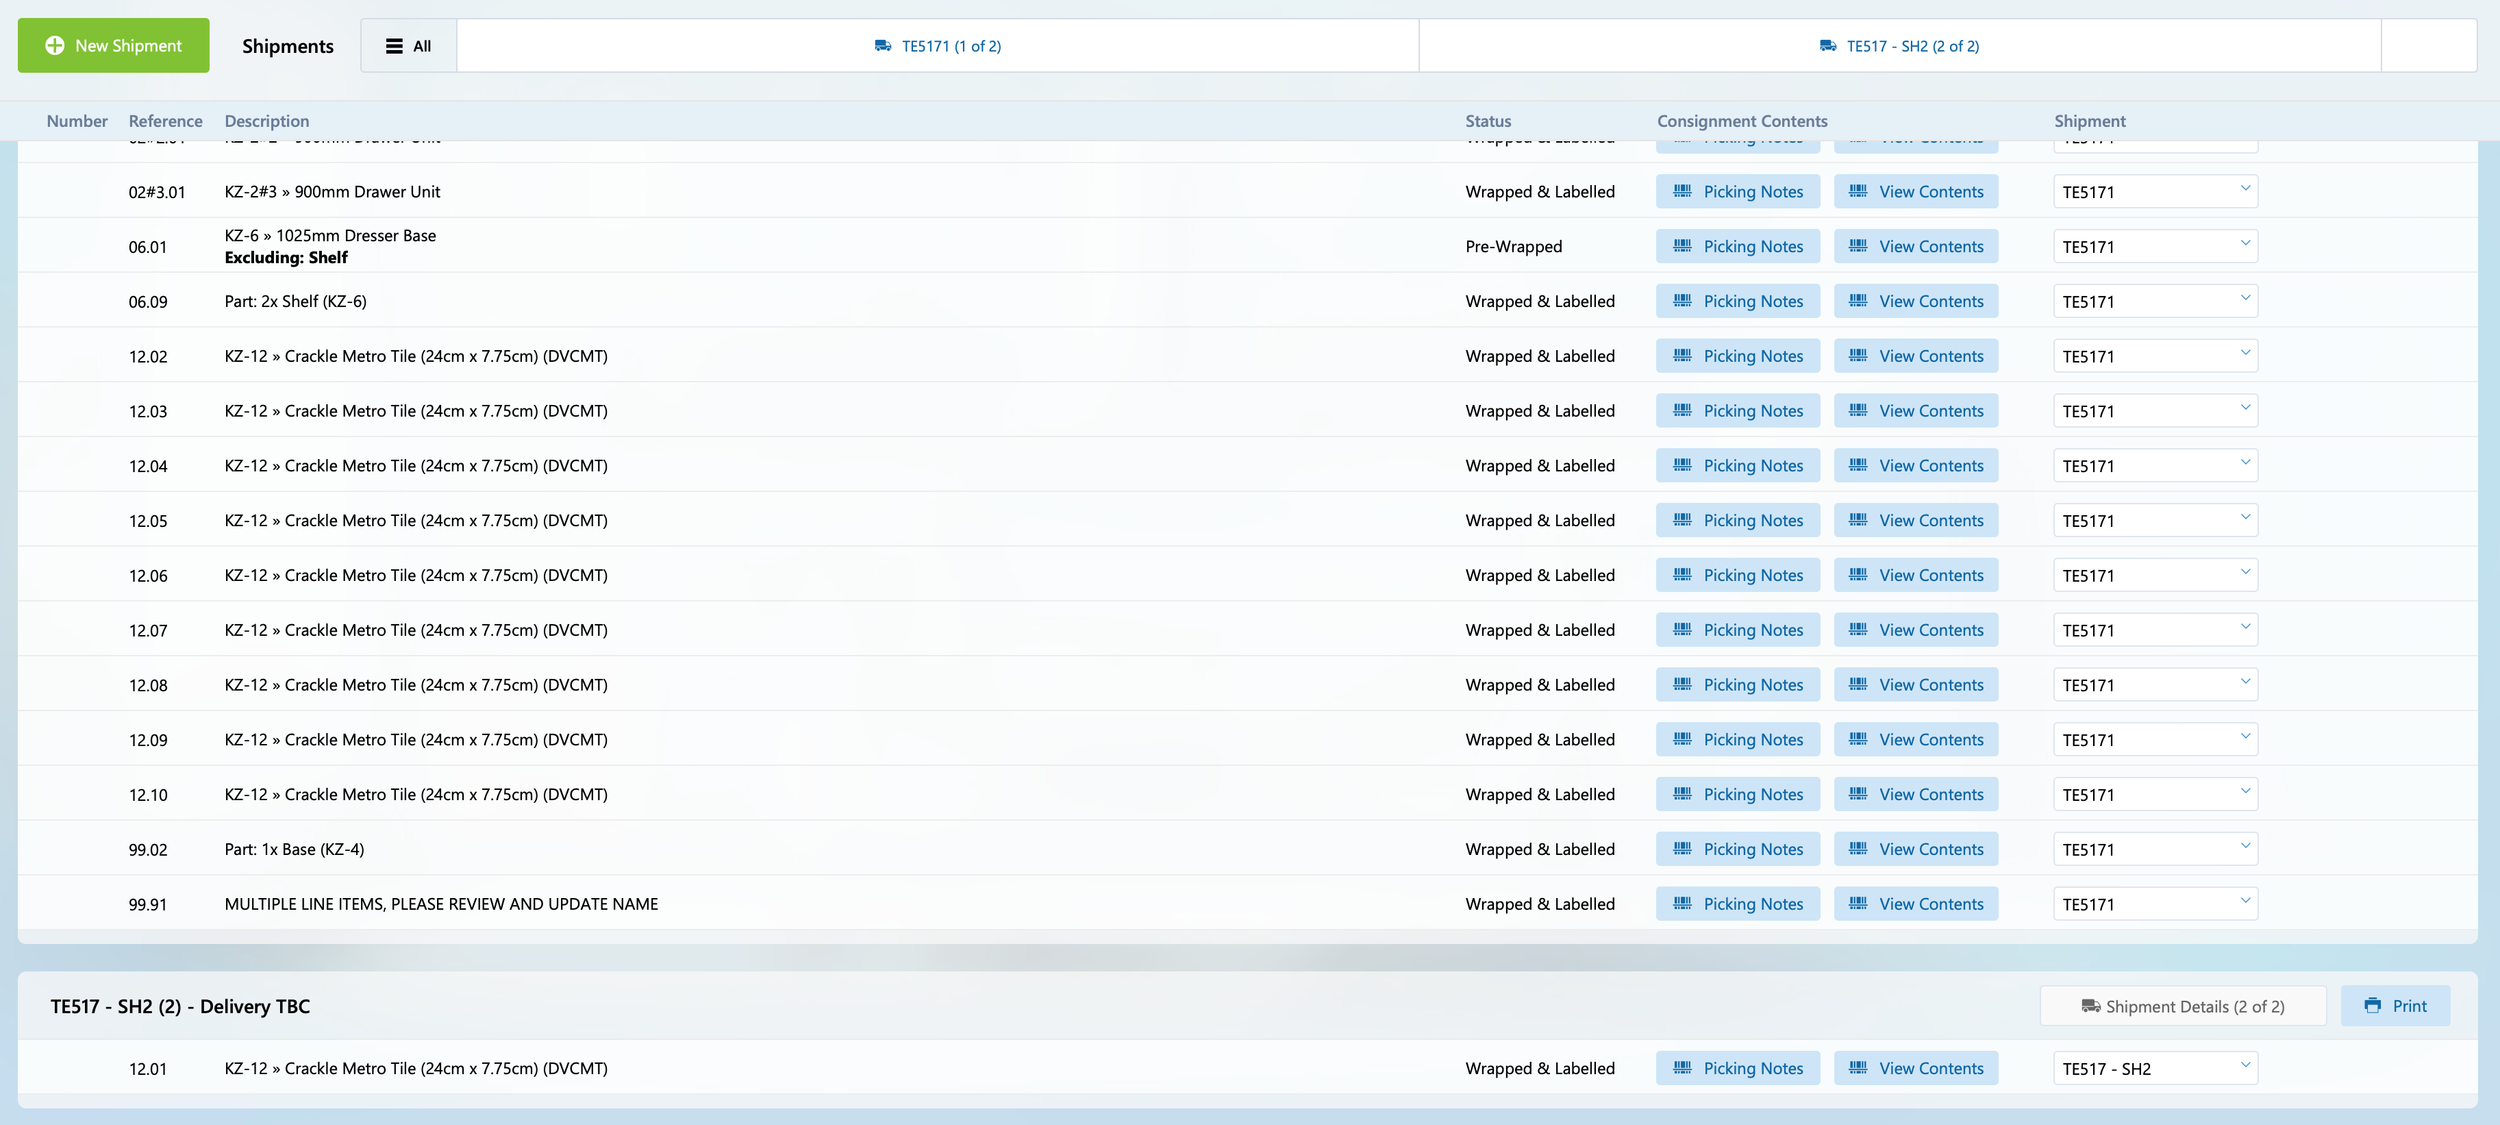
After selecting a different shipment the view will update the view to show the consignment in the new shipment. This can be done as many times are required to put the right consignments in each shipment.
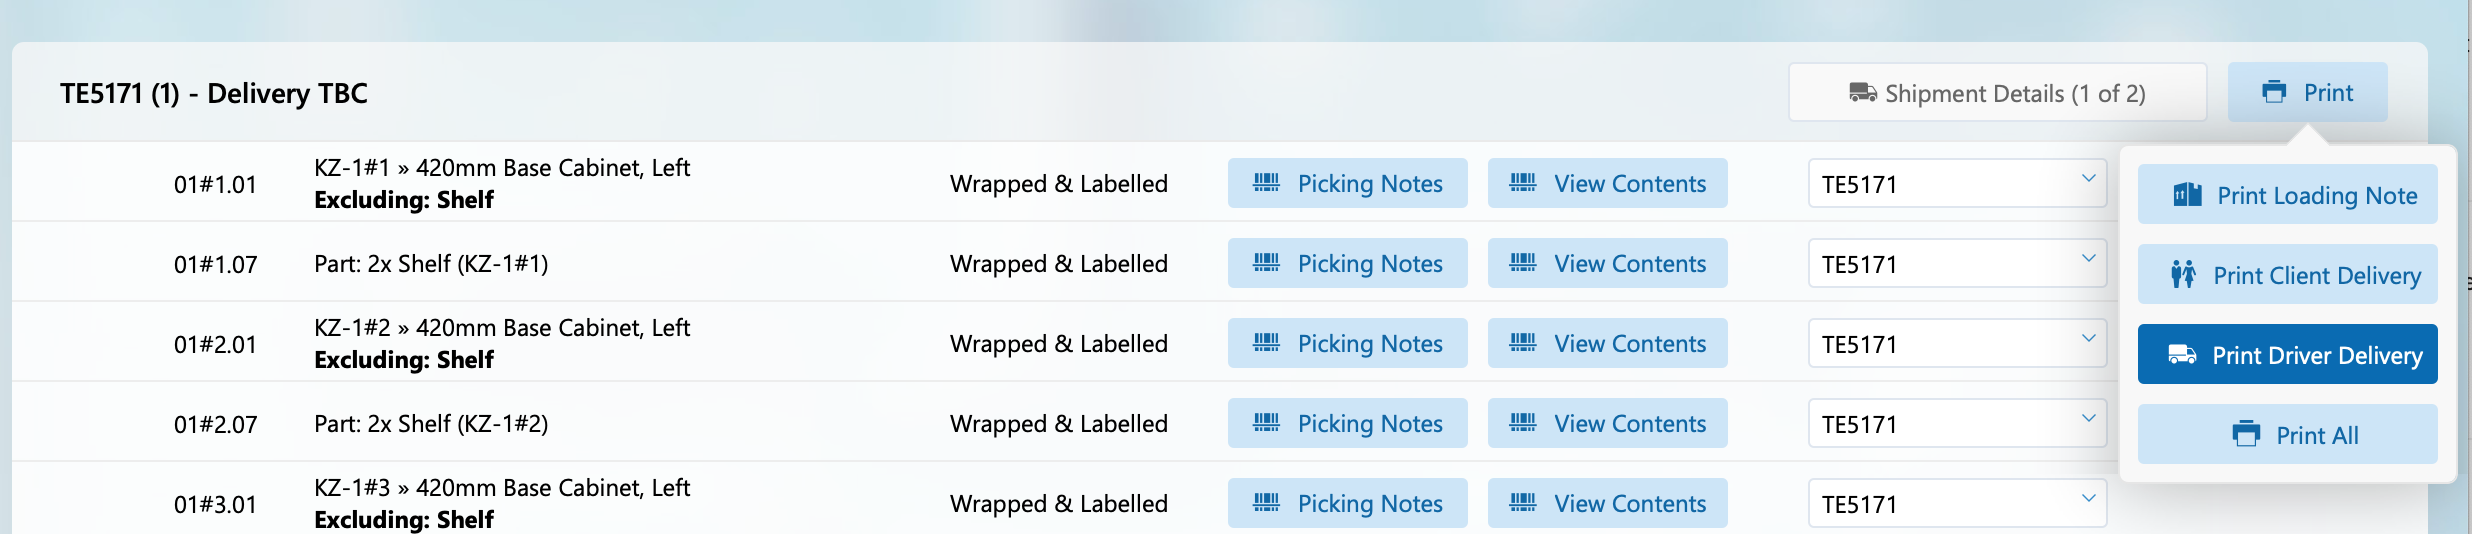
It’s possible to print an individual piece of delivery paperwork or all documents in one go from the print popover. These print options are also available from the Shipments popover on the Consignments layout.
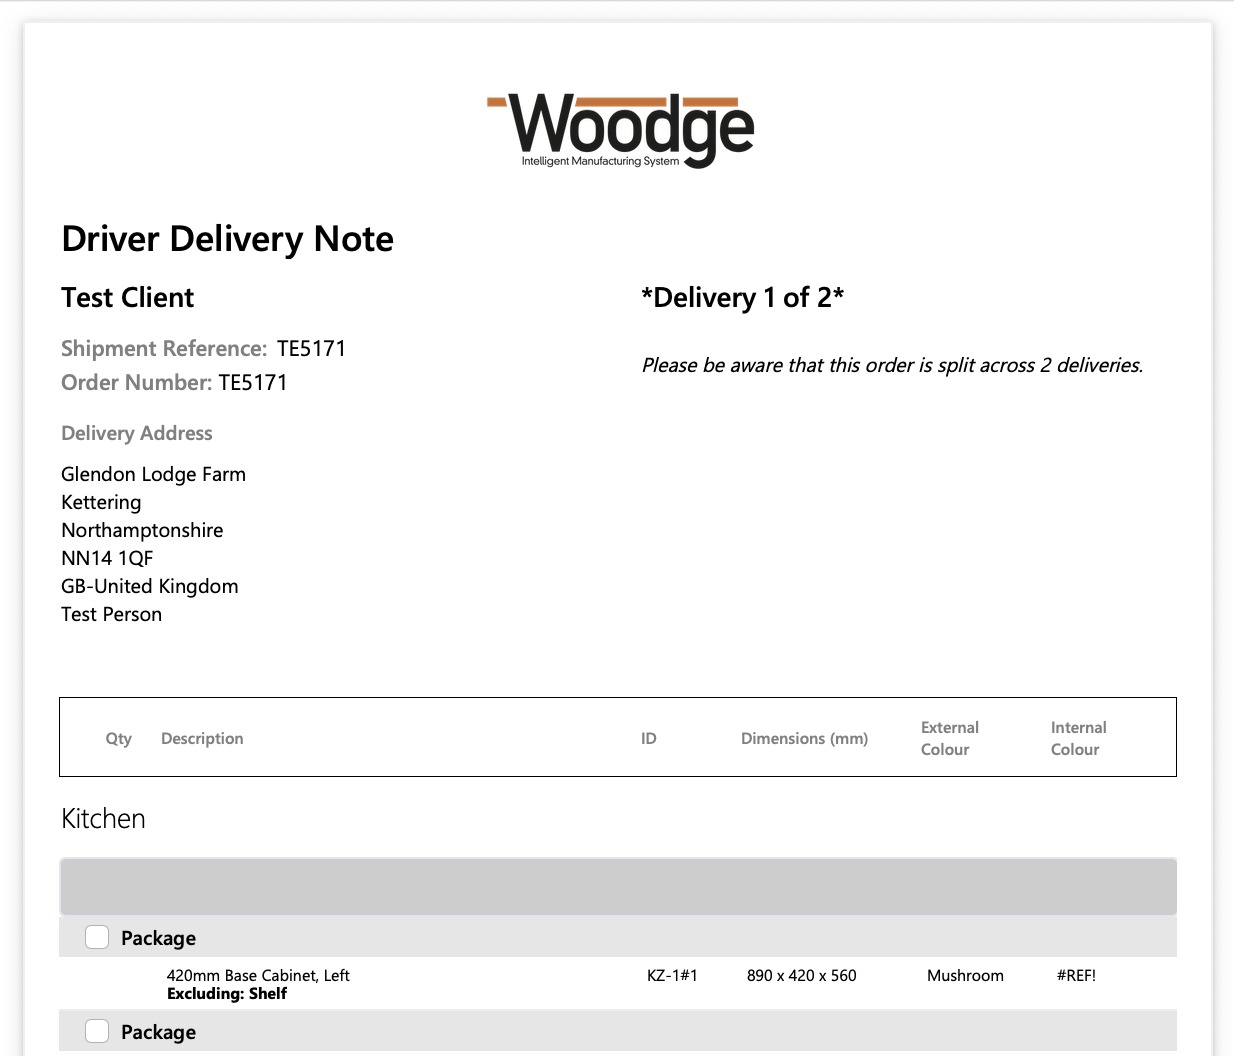
Example Driver Delivery report.
Parts Not Consigned
If products or parts have been added to an order since the consignment allocation has been calculated the system will show a warning stating “Not All Parts Consigned” on the consignments layout. To allocate these parts click the ‘Edit Allocation’.
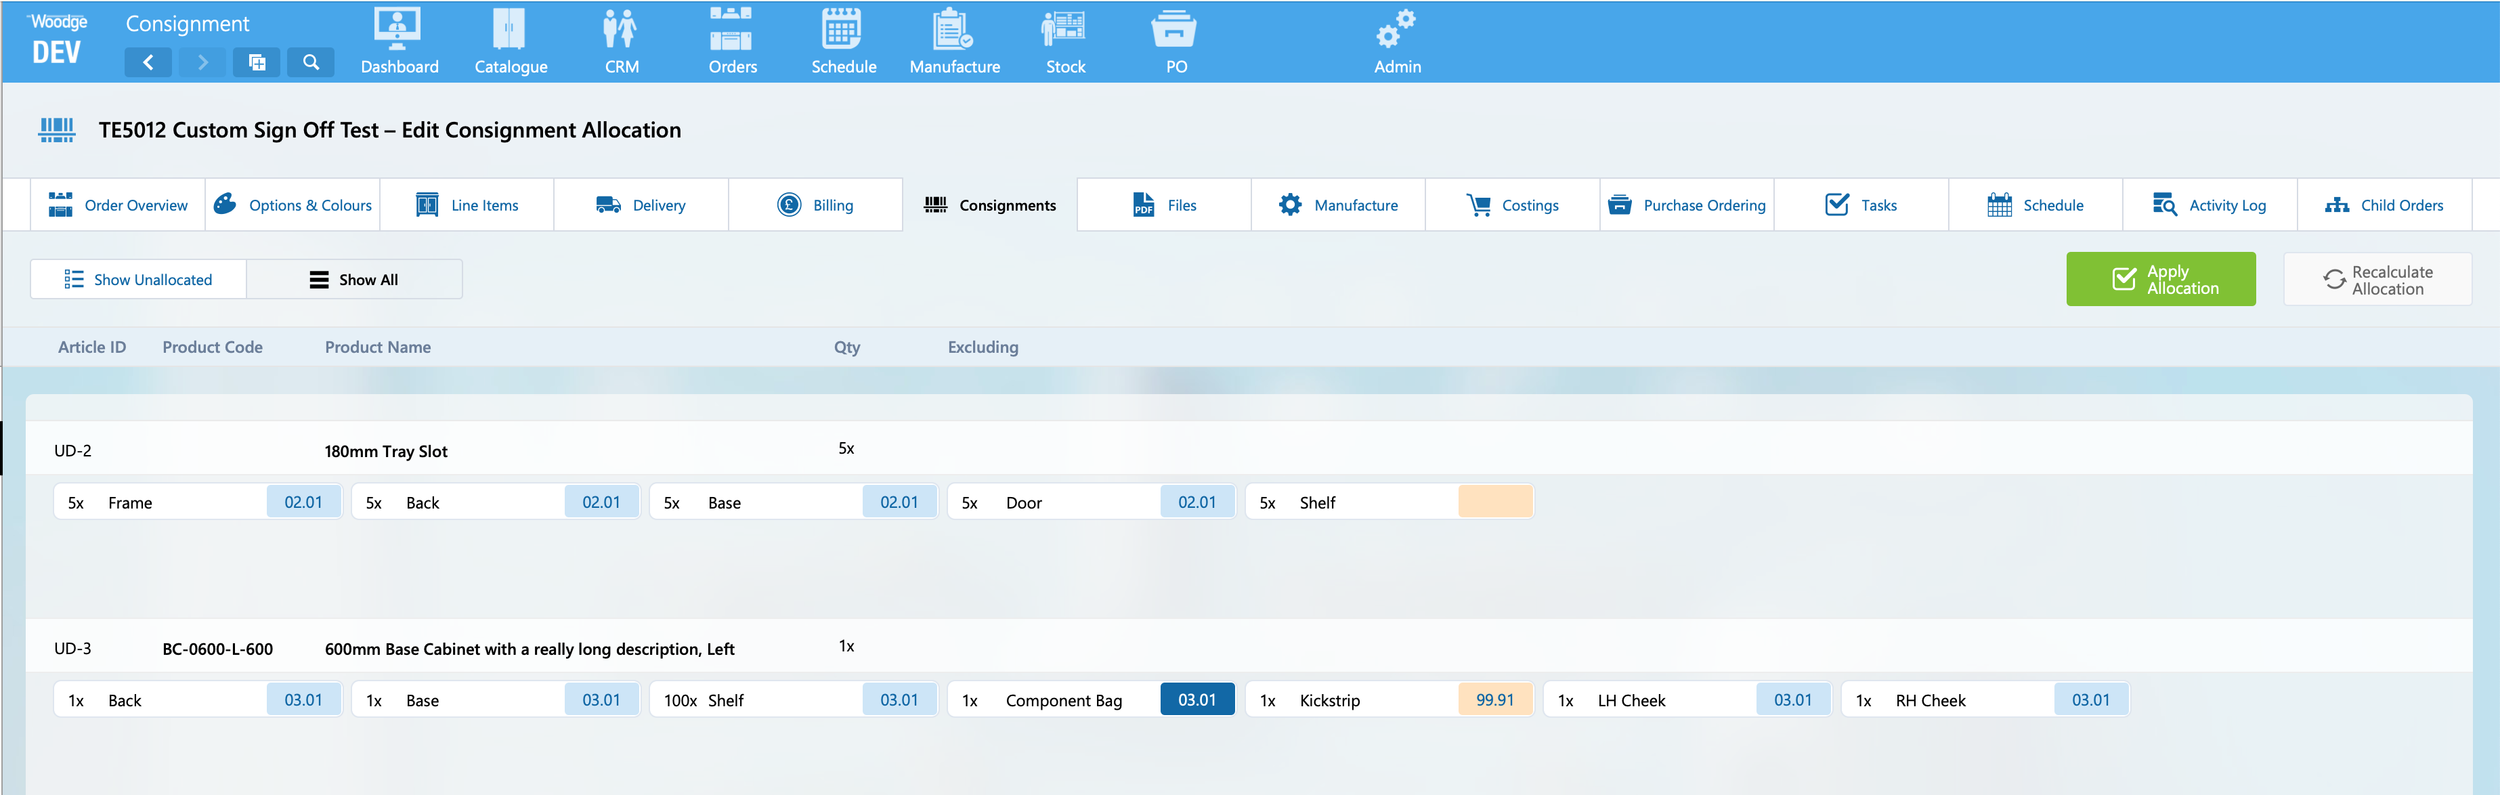
The will load the previously calculated allocation. Parts that were added to a line item after the original allocation will be highlighted in orange and not show an allocation.
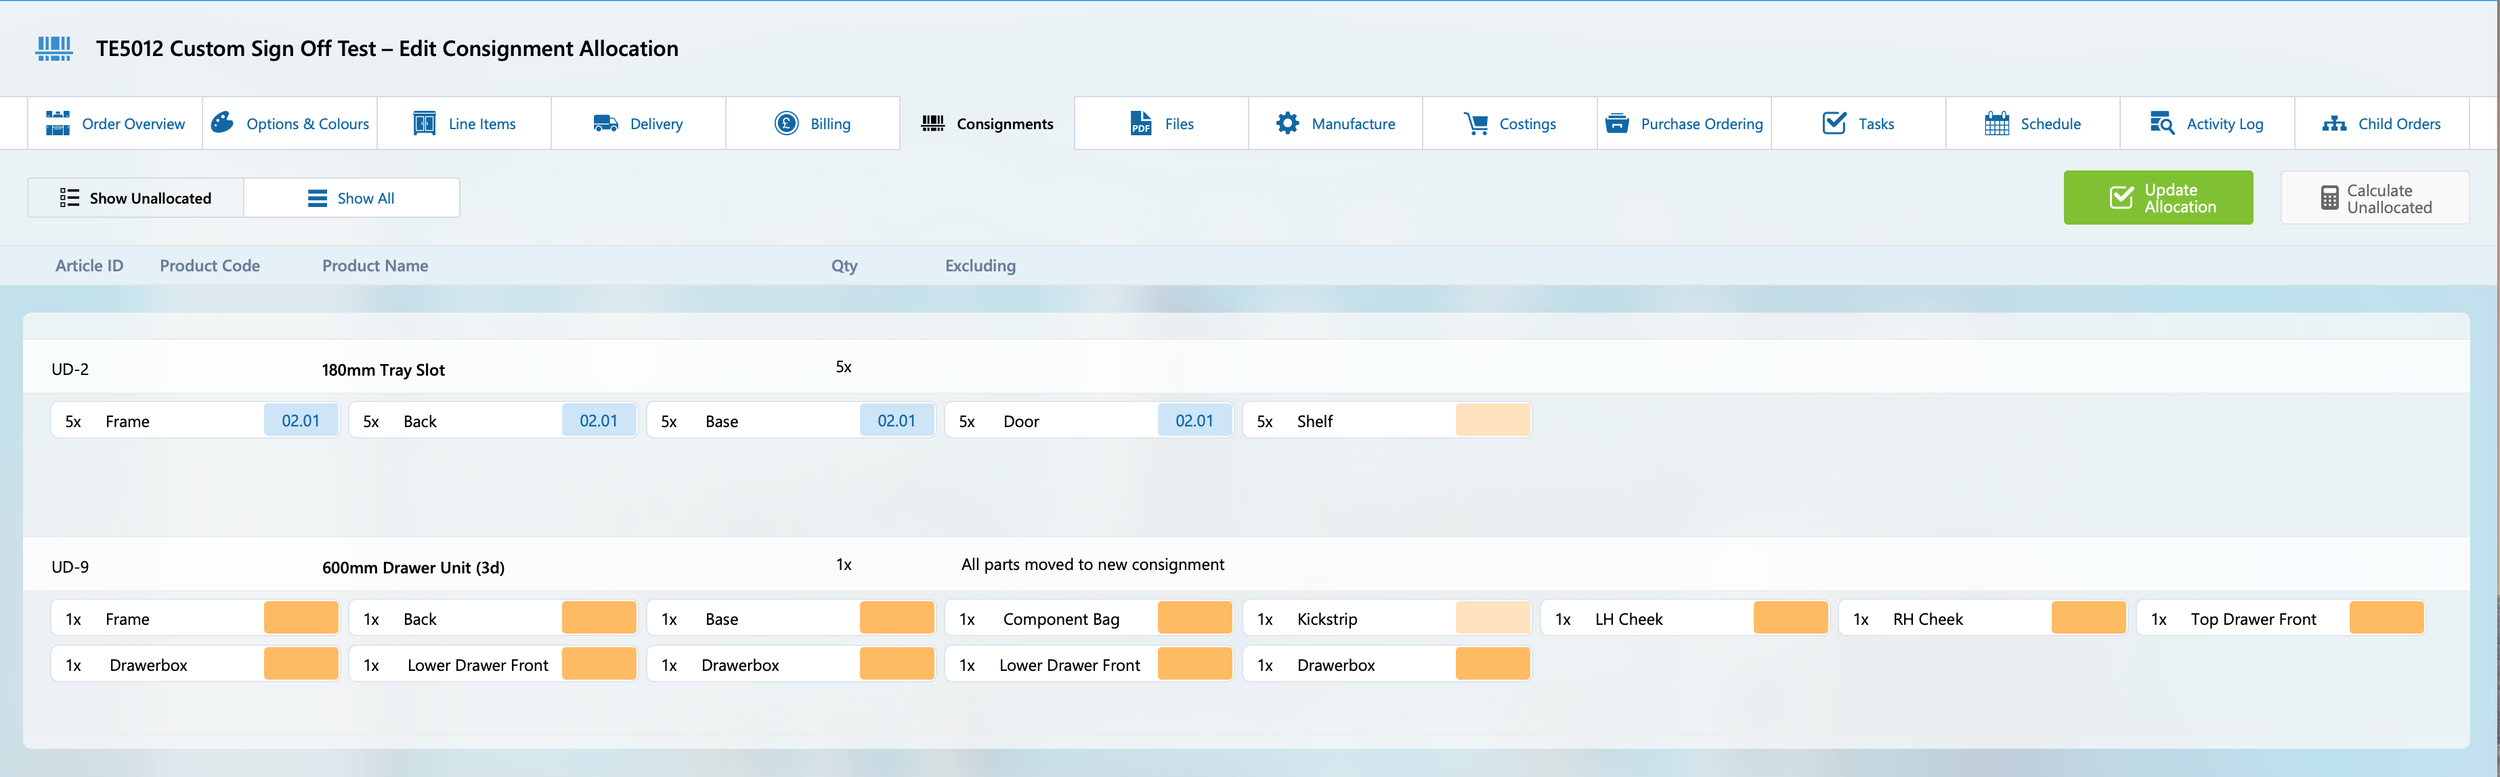
Clicking the ‘Show Unallocated’ filter in the top right will constrain the found set to line items with parts that are not consigned. To calculate the allocation for these parts, click the ‘Calculate Unallocated’ button.
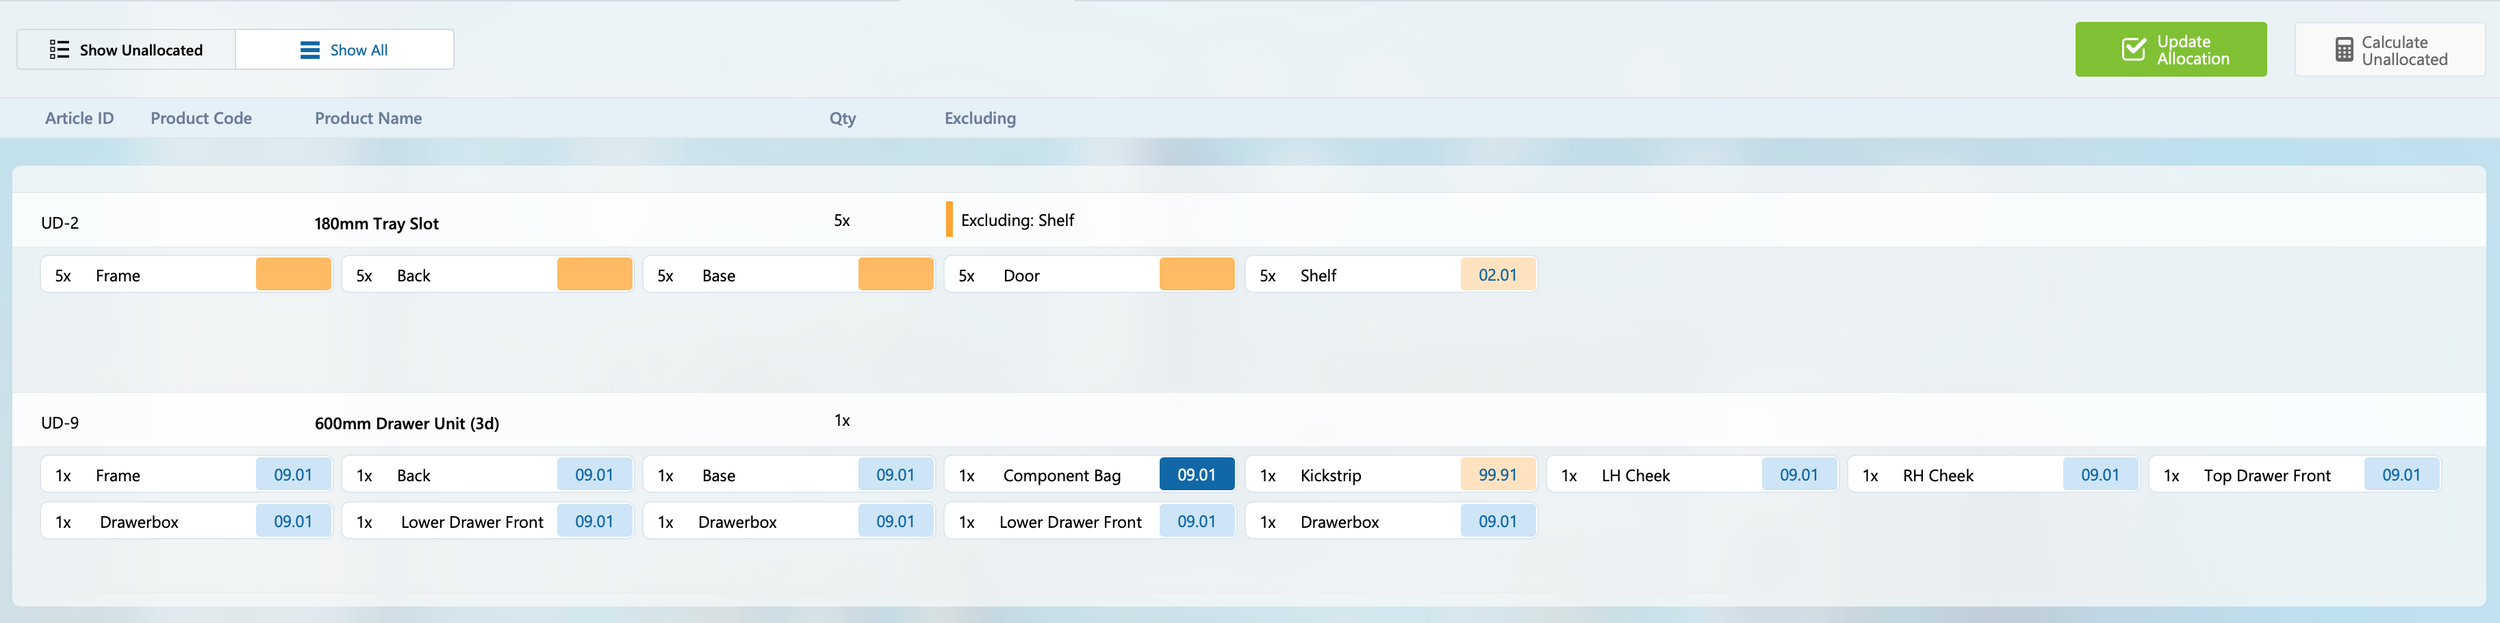
This will calculate the default allocation of these parts. This can be modified as required. Clicking ‘Update Allocation’ will generate or update the consignments.
Any new consignments or consignments that have had new parts added to them will be highlighted in orange and shown at the top of the list. These should be checked and have their paperwork or stickers reprinted as required. To edit the consignment click the ‘View’ button.
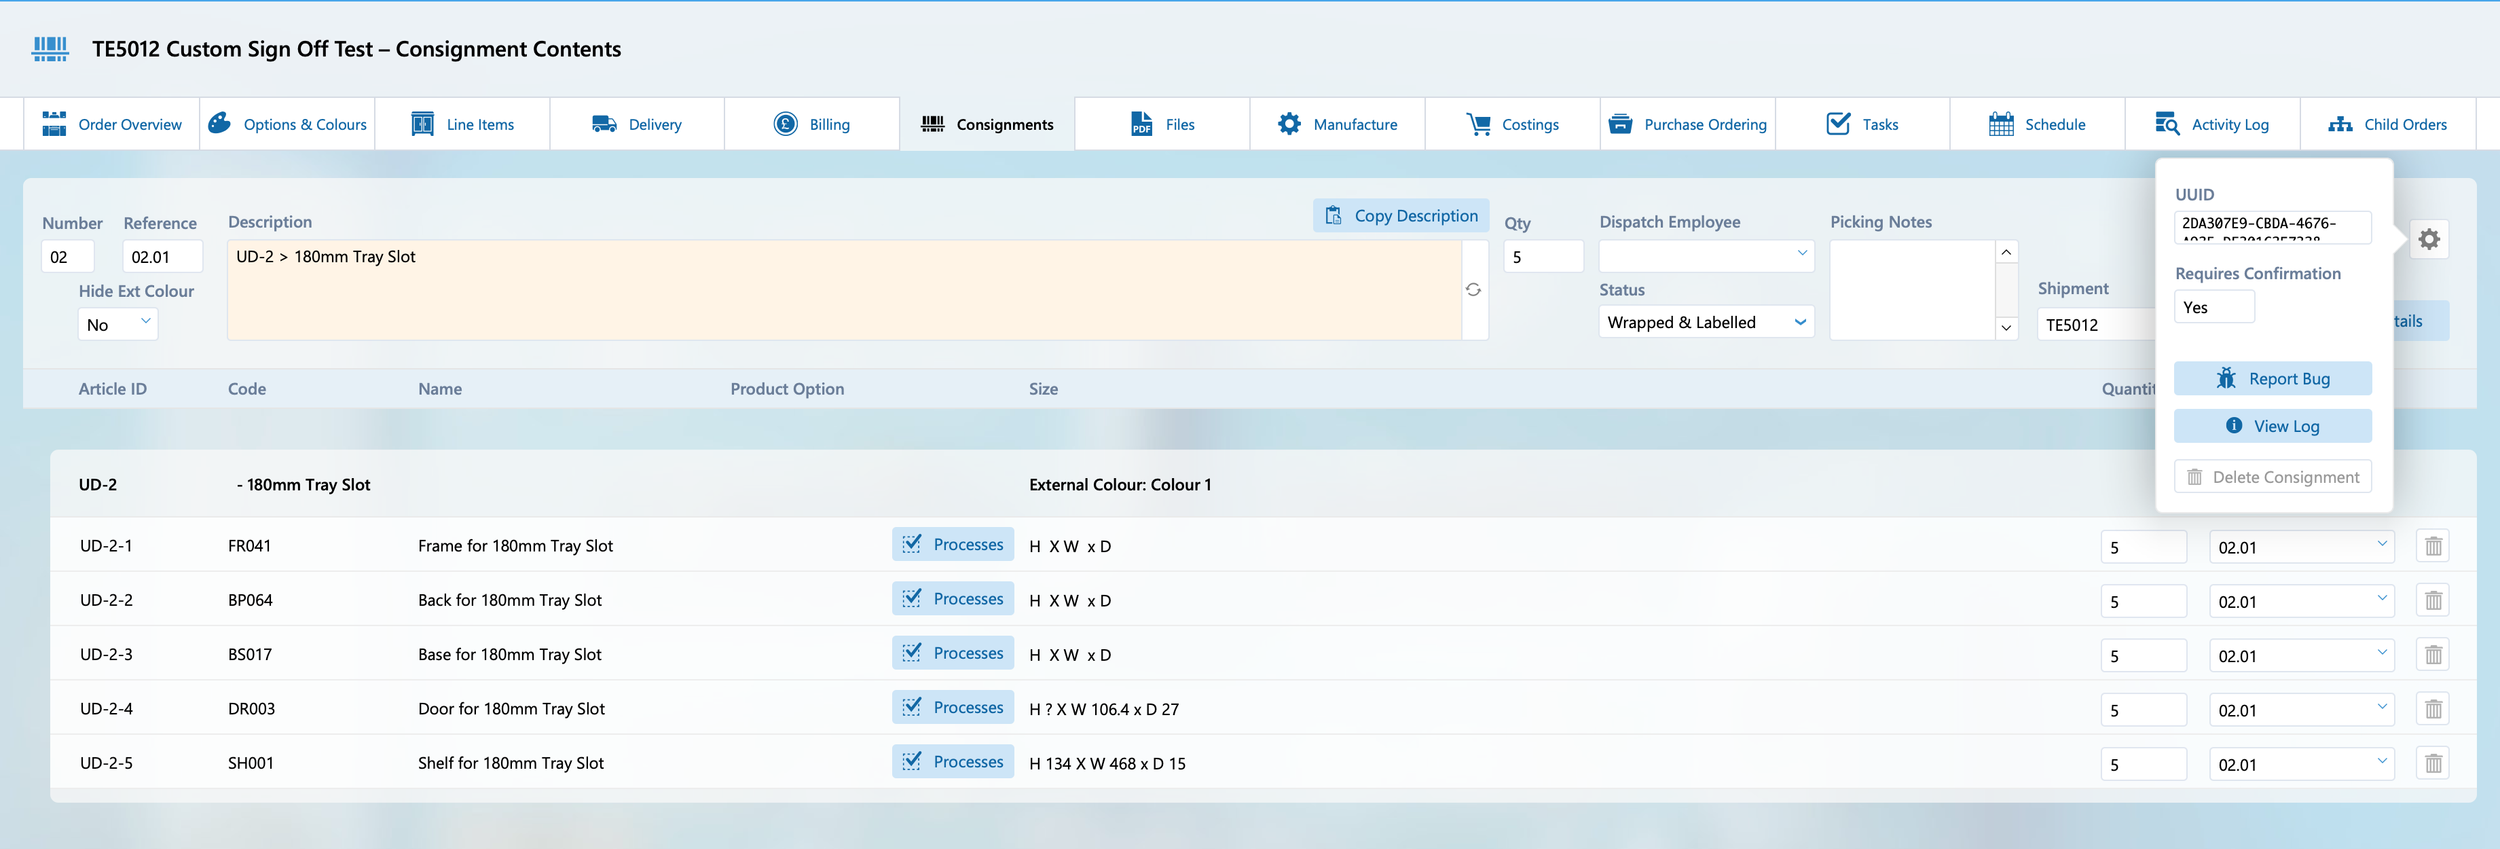
Once the required changes or reprint has been made the consignment can have the field ‘Requires Confirmation’ set back to no from the settings cog.

If a consignment was newly created the it will not have a shipment this can be manually entered as shown above.
Once all the required consignments have had ‘Requires Confirmation’ reset to ‘No’, you will see no highlighted rows in the consignment list.